

chris
-
Posts
1,256 -
Joined
-
Last visited
-
Days Won
78
Content Type
Profiles
Forums
Gallery
Posts posted by chris
-
-
I use streamline spacing. No issues.
-
 1
1
-
-
@mick, Any chance you could write up a quick Topic on Sprung Points. I'm already struggling to find the posts this topic. It's a genius idea and it would be helpful to have it as a stand alone subject.
Cheers
-
One of my friends has found your YouTube channel and shared it with our "Modelling Mates" WhatsApp group. A summary of the responses is...
Wow!
Keep up the good work @mick
-
 1
1
-
-
Hi Chris,
I like the look of your work so far, that's some good quality construction which will stand you in good stead.
I think your track plan is a great idea. How long will the loop be? and how long will it take for a train to reappear at the station from the garden?
cheers
chris
-
1
-
-
On 20/06/2020 at 22:33, Clay Mills Junction said:
Thanks Chris,
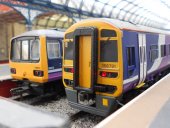
Yes, it has definitely been a learning experience and I do have a number of pipeline projects. I have the other identical 158 that I will hopefully be able to address some of the shortcomings of my first go with. I have a Lima 156 I could also have a go at, I will see. Bachmann will at some point do a Scotrail 158 I hope, Dad can have one of those and these original 158s can be be dedicated to garden running.The 156 (Hornby/Lima) was my first lighting job. I went for headlight and makers lights. It looks good, but I've tended not to bother adding marker lights since then.

The roof comes off this model, which makes it very easy to work with. But you will need to add power pickups to the wheels of the trailing car. A skill I have yet master.
-
11 hours ago, mick said:
Thanks Chris. I was initially going to edit out part of the delay between the log train passing and the sleeper making its move because I don't like to keep people waiting when all they really want to see are trains moving, but it just felt right to leave it as it was and it certainly wouldn't have been the same if I had done so. It's why the double track section is there, to create a sense of realism, so I need to make use of it.
Timing is everything. Yes there was a wait, but surely the viewer knows what is coming and that adds the excitement of anticipation.
-
8 hours ago, Clay Mills Junction said:
think I saw your light improvements on the 158 some time ago and decided to have a go at the same time as DCCing my own. Though I don't have an electronics degree or qualification in any form so it is nowhere near yours in quality. I also used this webside as a guide. I wasn't bothered about day or night, happy with just day lights so that is all it has.
Hi Barry
I think you have done great job. The 158 is one of my less successful lighting projects. I think I was lazy, leaving uninsulated wires exposed and a short or two has taken out an LED. The website you link to is an invaluable guide. I emailed the author, Martin, quite a lot when I was doing most of my upgrades. As I say in this thread, he designed the simple circuit switch that enabled parking lights control.
Brightness levels are very tricky to judge. What looks right on the workbench can't be seen outside. Although I want my lights to be realistic, it's more important for me to be able to see them from the other end of the garden which means I have them very bright. I think we forget that lights on trains are very very bright, they have to be seen by track workers from a distance much further away than even the scale length of my garden.
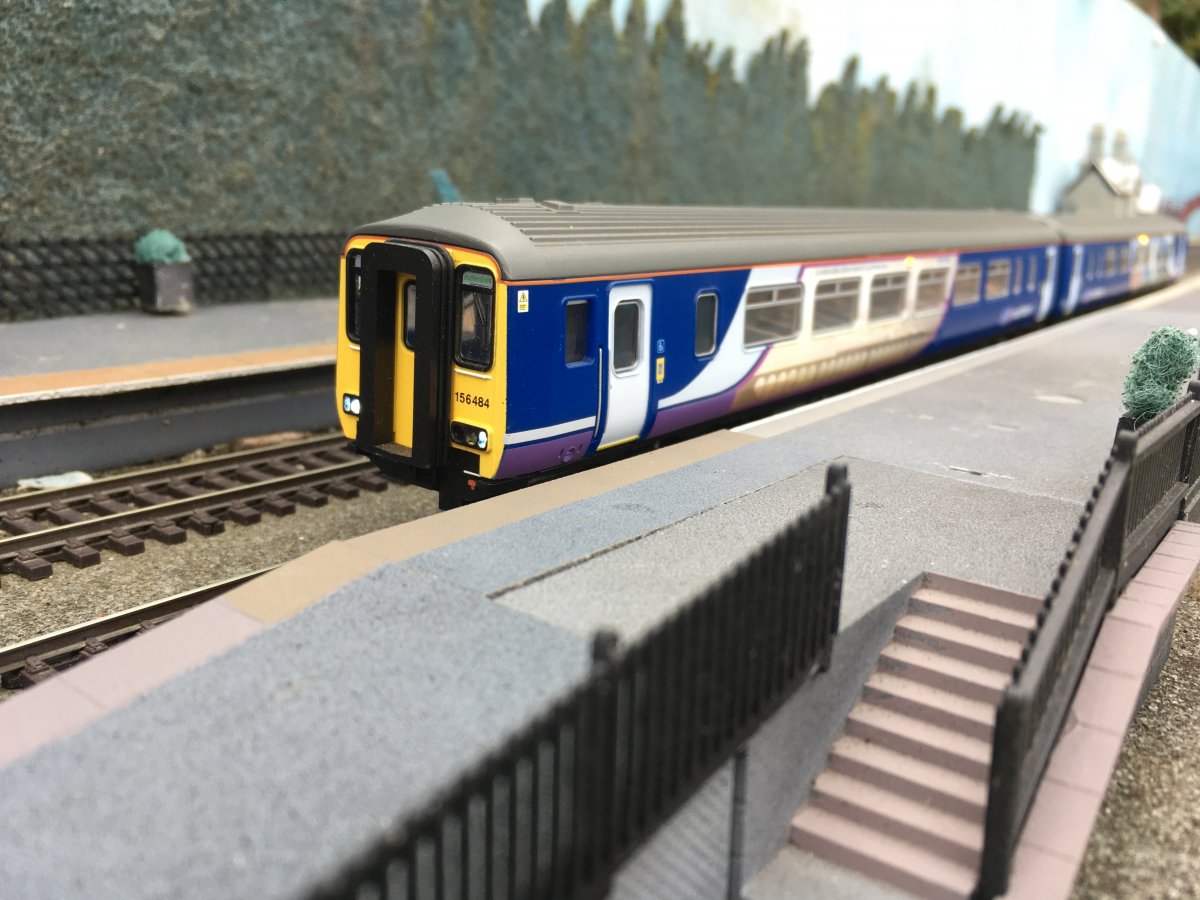
Hopefully this has got your confidence up. You have started with a tricky model to convert and done an excellent job. If you tackle any more units I strongly recommend adding the yellow door warning lights. They make a tremendous difference when a train stops at a platform.
-
The sleeper waiting for the freight to clear was a real highlight.
-
1
-
-
Two steps forward one step back. Most of yesterday was spent working on the trailing bogie. Getting the wheels to pick up power took an age. After a few test runs I found that my simple pivot system wasn't good enough and I will require a second pivot point. This shouldn't be too difficult to achieve, but having snapped one bogie yesterday I can't make that mistake again with my backup one wheel set.
-
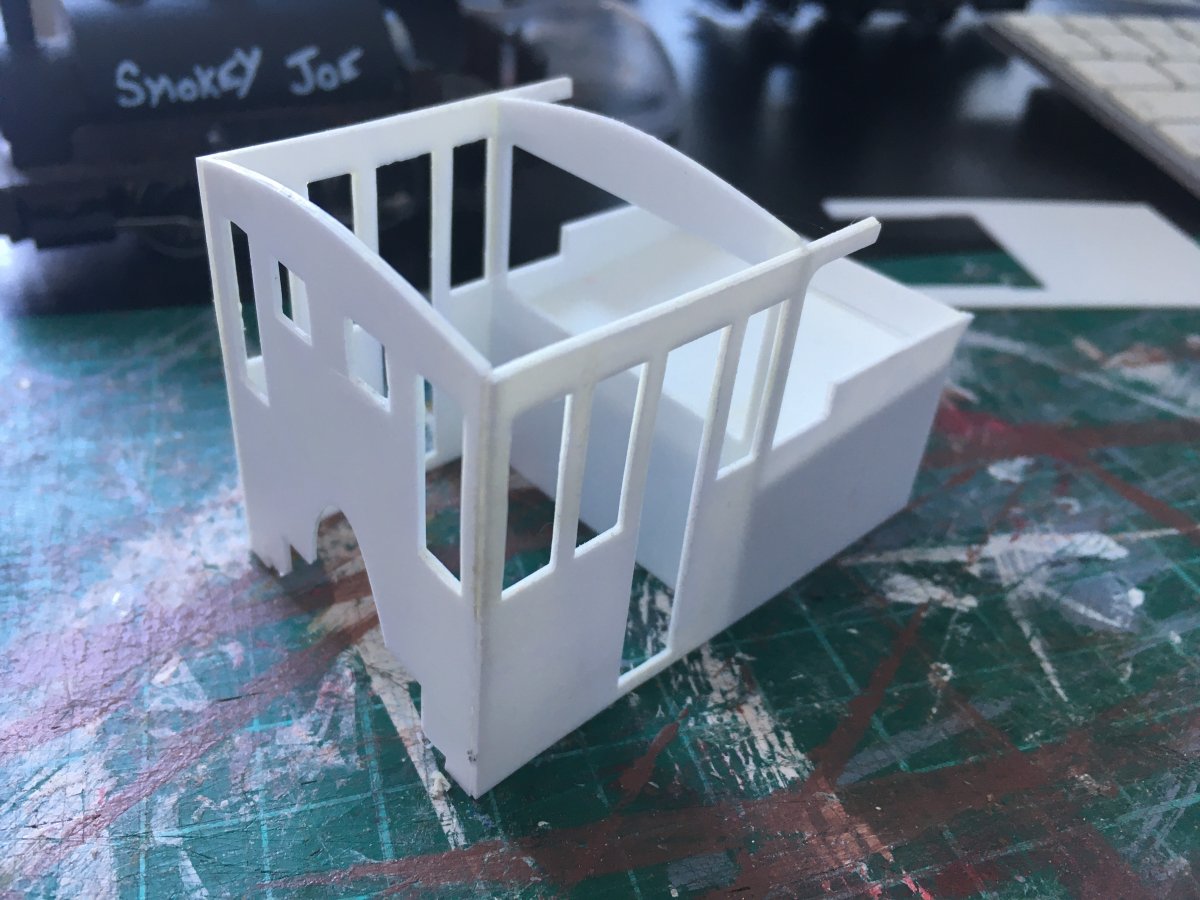
Styrene cab
Just the roof to cut, and some tidying up of those edges.
-
1
-
-
With The Paltryville Ridge and Peak Railroad now running services it is time to increase the size of the working loco fleet.
Task one was to DCC a Porter I bought 3 years ago. For 2 years I thought it couldn't be done because taking it apart was next impossible. Turns out, it was quite easy. So I did that last year. Then I spent a lot of time trying to workout how to hide the chip and wires. As is my usual practice, I left it in a box in bits for year.
Yesterday, with the new determination of lockdown life I had another go. This time it was going to happen. And low, it did happen.
I chose a different location for the chip, between the pistons rather than in the cab. this simplified and shortened the wiring. It became a simple job: cut, strip and solder wire.
More surprise than relief, it worked first time, headlight an all.
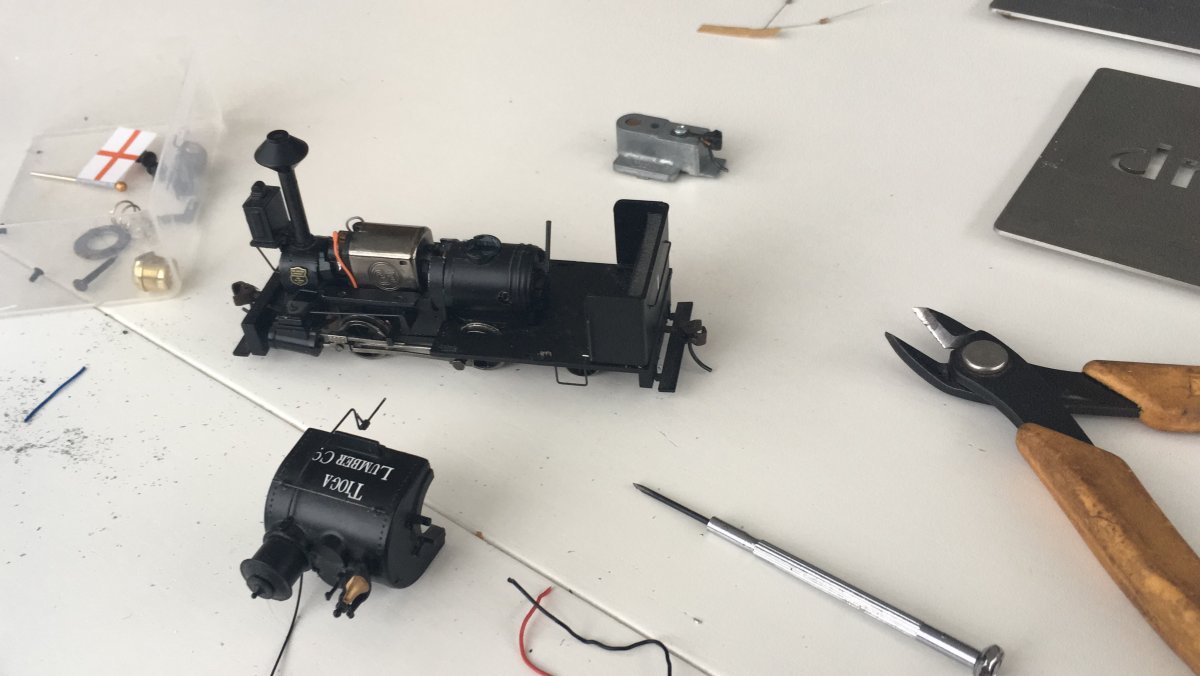
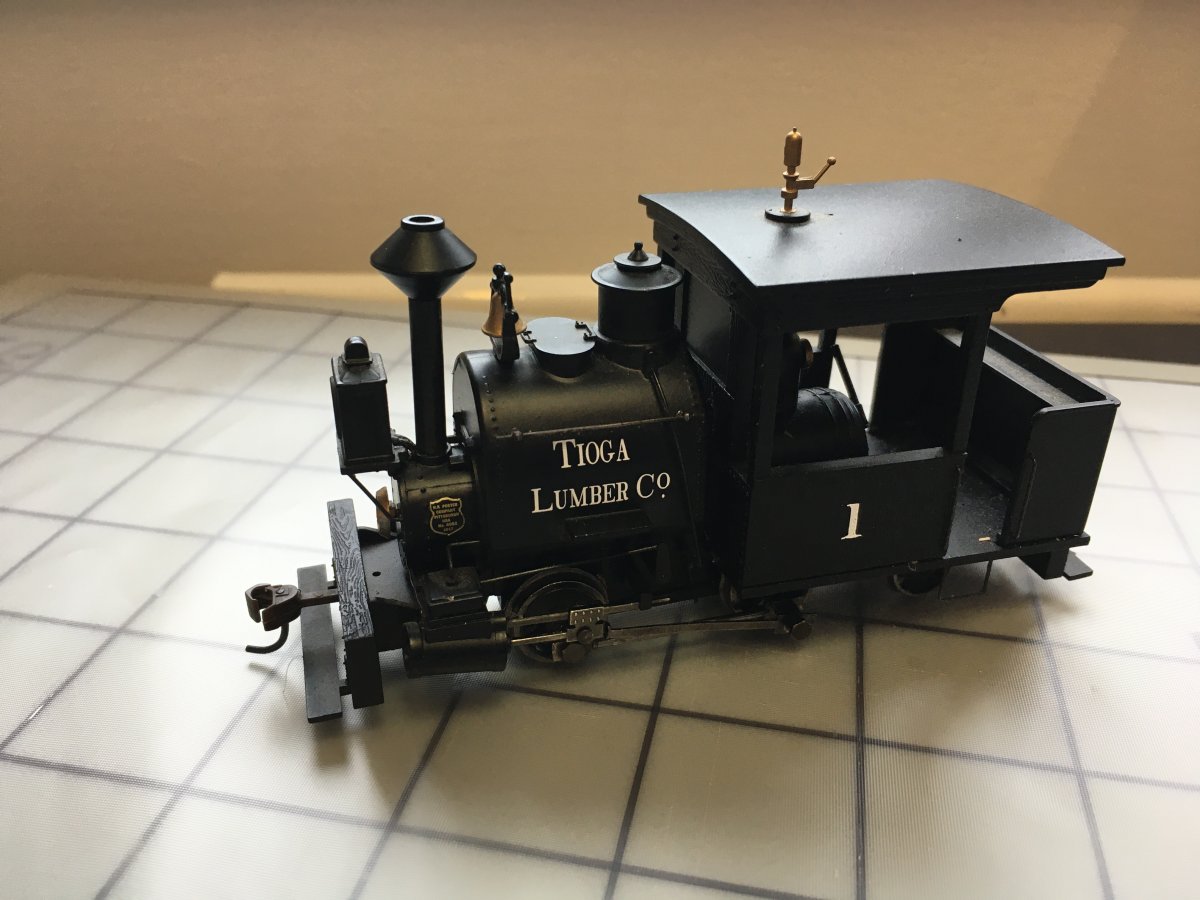
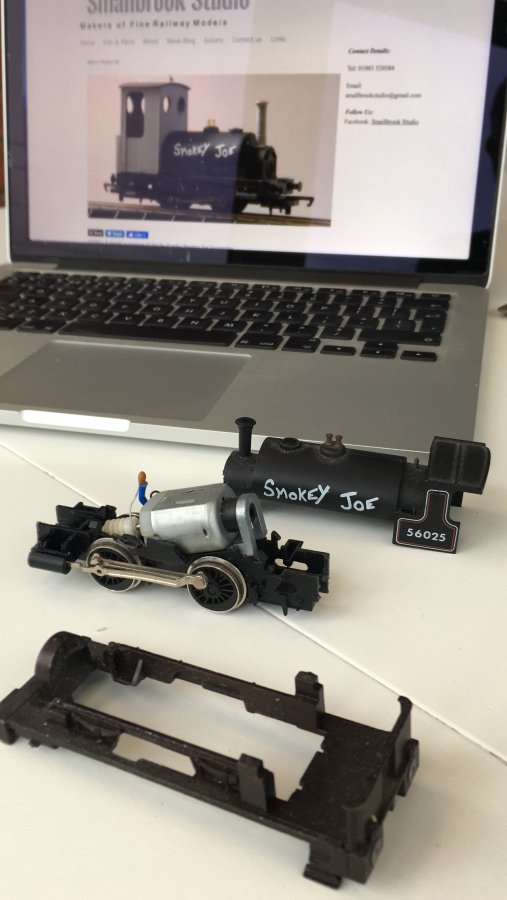
So on to the next loco that has been in bits for a year, or nearer two. Good ol' Smokey Joe.
Its a classic loco to convert to O-16.5 for UK modellers. I'm going freestyle American.
I hacked the cab off with a razor saw, the buffers had been previously been liberated by the same tool. The digital calliper went to work on the dimensions and graph paper sketches were draw to get a feel of a design. Lots of prototypes were viewed until something I liked emerged. This afternoon I fired up the plotter cutter and knocked up a cardboard prototype cab and coal bunker.
I'm adding a bogie to turn it into a 0-4-4. Seeing USATC 2253 "Omaha" on the NYMR last summer, I was taken with the design of having bogies under the tender. A trailing bogie isn't uncommon on US narrow gauge locos, and I had a spare...
I plan to make the cab from styrene. This will be the first time I've used it with the plotter cutter so there will be a learning curve.
-
It's an interesting idea. But at the price and bearing in mind the manufacturers track record on this kind of innovation I would worry about its reliability.
-
8 hours ago, scoobyra said:
For anyone needing a cheaper DCC Decoder to work with the CDL motors, in theory, a DCC Concepts AD1-HP should do the job. I’ve ordered up a CDL motor and will confirm once I get the chance to wire it up. I’ve got loads of AD1-HPs that I took off of Oak Road when I switched to Digikeijs so it would be daft not to use them. They have two outputs that are both + and - firing the opposite on Y / N, and above all, you can buy them for under a tenner! £6.50 if you look on eBay.
The AD1-HP don't appear to have a discharge capacitor so I doubt they will work CDL off track power. May be OK with it's own 12v power supply.
-
Your construction technique is similar to Roy's on the FAULCONWOOD AND SPRINGBRIDGE RAILWAY. However, you are building yours with deconstruction in mind. Roy ended up demolishing his outdoor railway because it wasn't as weather proof as he had hoped and his construction technique didn't allow for replacement of individual sections.
Not sure if its your technique or your personality, but by heck you are making impressive progress. I think it took me 4 years to complete a loop of my small garden.
-
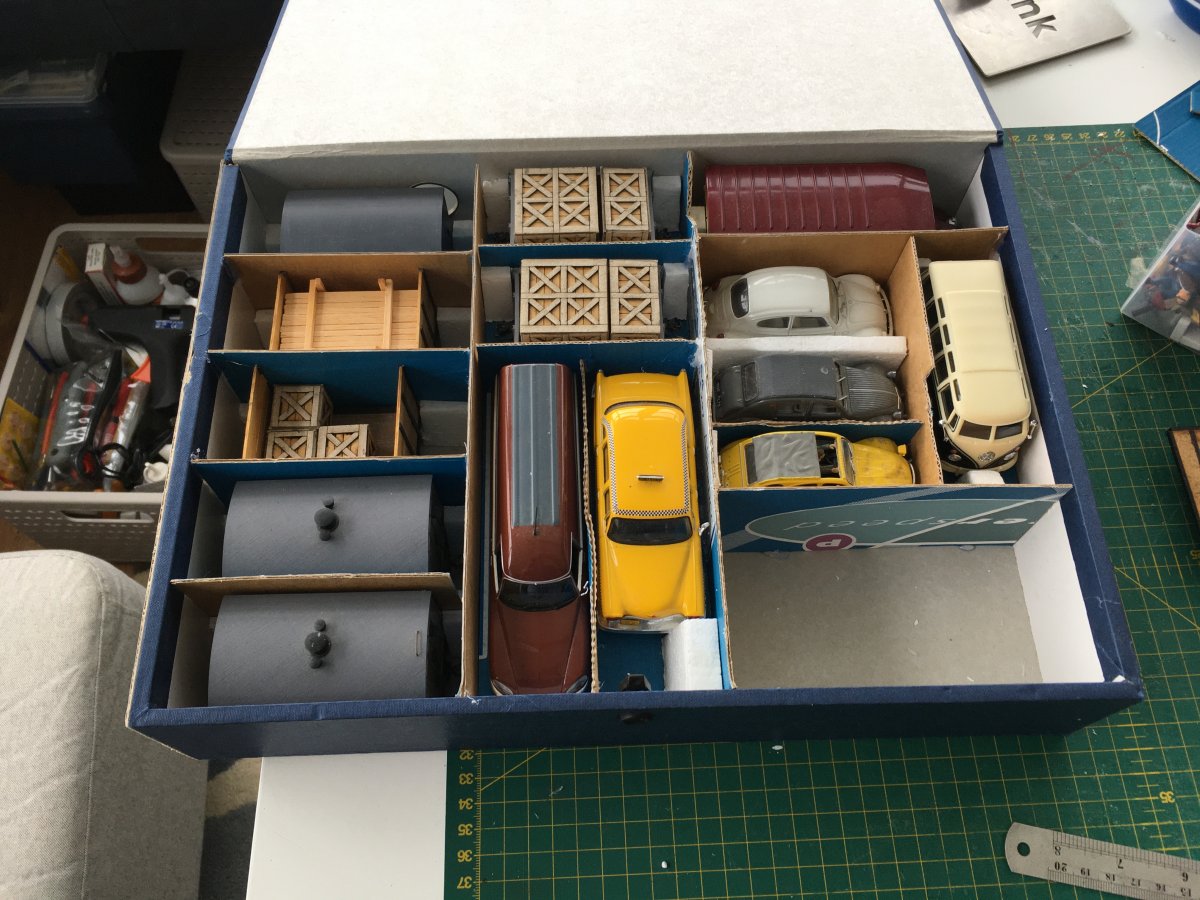
Half my On30 rolling stock has been stored loose. With Paltryville up and running it is time to improve the storage for the rest of my fleet. Today I converted a box file to hold some 4 wheel wagons and coaches. I was going to house some locos in there as well, but it wasn't suitable for my 2-6-0. I used the space for my cars and vans.
I have a simple technique using cardboard, polystyrene and a hot glue gun.
I've got another box ready for the loco fleet. Probably time to crack on and finish the job of DCCing my Porter, which has been in bits for more months than I care to remember.
-
I built a three unit version of one of the kits for a mates back scene. I had to trim it down to size by 1 cm per unit, but this was done in the software and the plotter cutter did the hard work. Got through another 9 cereal boxes on this build.
I think I cut up a dozen cereal boxes to build a 1.2m retaining wall for another mate.
-
Any chance you guys could write about these great new materials in the Track Base construction section. It would be handy to have a separate topic for each material so we can point people to it when they are after advice. Cheers.
-
17 hours ago, scoobyra said:
This is exactly what I’m looking to do with my garden railway Chris - you’ve made a cracking job on those platform ramps
Thank you.
For once I recorded what I did. Details are in the Structures & Scenery section.
-
18 hours ago, scoobyra said:
This is more about having an indoor railway...outdoors.
The word the springs to mind is "Brave".
18 hours ago, scoobyra said:The only thing I’ve not got my head around yet is how I’m going to operate the points
I recommend you give the topic a read. Ive been using the car door lock motors successfully for years now.
-
1
-
-
1 hour ago, Virginia Rail said:
Before I converted to battery power I found that cleaning was becoming more difficult as the track aged, and maybe all that bending down was more difficult as I aged too! I used soap and water with a home-made ‘cloth on a stick’ tool.
There are many tips I've picked up form this forum over the years, I and many others are in debt to Mick for running this, but one of the best was track cleaning. @IanR recommended a Garryflex Abrasive Cleaning Block. All it takes to clean the track is a gentle rub and the rail tops are shinny clean. It takes me around 5 minutes to do my 70 odd metres of track and points before a running session.
For a little more info, this is what we had to say about Garryflex back in 2011.
-
I bought some Wago connectors after reading this recommendation. So that would be over 4 years ago. I didn't get on with them at first. But with a couple of wiring jobs on the todo list I had another play with them. This time reading up and watching how to use them properly.
I'm now a fan. The 222s in particular are very useful with quick release leavers that make them a breeze to use.
Connecting multiple wires together with terminal blocks a pain. With a couple of these its a simple job. I need to do a site survey under my baseboards to see where I still have temperamental connectors and get them replaced with these.
-
40 minutes ago, Virginia Rail said:
I have had to replace some of the springs (obtainable as spares from Peco) and it is, shall we say, a challenging task!
I feel your pain.
Welcome to the forum.
That last photo looks familiar. Have you made any YouTube videos.
-
I know it is nowt to do with me, but 'm really pleased the you have that twin track section back up and running. The spring points idea and implementation is genius. I hope you get a lot of enjoyment from the sight of trains passing in the garden and you ain't too hard on yourself when you crash trains into each other, cos it's going to happen, it always does.
-
1
-
-
Running session on Amblethorpe this evening. With visiting Locos. Taking the opportunity with the relaxation of lockdown rules, 4 friends (remember those?) came round to play trains. Two came into the garden and two stood looking over the fence.
It was glorious.
The track was less than glorious.
These three dry months have allowed a couple of bits of baseboard which have had water damage to dry out. This has not gone well. They have puffed up under the roofing felt. A couple of sections will need replacing. But, I have the time.


.gif.9c8d96676dd3d9d72bc4638f51aefa1d.gif)

Crafting (paper) Cutter
in Members Workbench
Posted · Edited by chris
typos
As the weather switched from too hot for being outside to too wet for being outside I cracked on with an indoor task. My biggest project yet with the plotter cutter.
The backsence to The Snicketway is currently stored in view. I decided that it was worth an upgrade. I searched the streets of Harlem for a prototype and found some suitable brownstones, painted in bright colours.
They were quite complicated. but I worked out that i could fit three of them in the space to replace two simple houses.
Three of very similar design really plays into the strengths of the plotter cutter. The time spent on the design pays back three fold. I'd recently got some new sheets of card so had plenty of colours to choose from.
There were 3 or 4 nice challenges in the design. The roof line is fancy, and required several layers of card. The bay windows require a bit of trig to workout the angles. And I had 6cm depth and 9 width to play with the steps and their right angle turn.
The plotter cutter is great for knocking out a paper prototype. A quick check that the layers are fitting together to create the right effect. It gets very confusing creating all the layers spread out on a sheet of A4 rather than on top of each other as they will end up. I built a prototype stairway first to check it worked.
I spent a week on and off on the design. On Sunday I was determined to crack on and get it done. By 10pm. I had all the parts constructed, but all in separate sections.
This is 12 different sections placed together for a photo.
Monday was another mammoth build session. I joined the three main sections with a backing sheet and attached the rooflines.
So far so good.
It became apparent the the bay windows were too big for the building. They fitted, but didn't look right. I stuck them on anyway.
This was a mistake. I couldn't live with them, they looked wrong. I pulled them off. But having used Roket Card Glue, this ripped up the wall card.
I redesigned the bay window smaller. Built one. It was much better. New sections of wall were cut to cover over the trashed bit and two more bays were cut, built and attached.
These fitted with the balance of the building.
The steps were added while trying to keep everything perpendicular, always tricky in 3D.
And the result is rather impressive.
Still need to be added to the scene, bu this is where they will sit once I've removed the current housing.