

chris
-
Posts
1,256 -
Joined
-
Last visited
-
Days Won
78
Content Type
Profiles
Forums
Gallery
Everything posted by chris
-
The manual is far from clear on this UTP front and I did a lot of reading before I understood the limitations of the PowerCab system. I'll try and explain... To run a DCC system you need a Command Station (CS) that is in control of the whole system. The Command Station issues commands to the trains and accessories, it has to be connected to the track at all times because it is supplying power and broadcasting it's data continuously. The CS is the track interface, the system computer. DCC also needs a human interface (just like a PC needs a keyboard and mouse) so we can tell it what to do, this is called a Throttle or Cab. The throttle can be a simple affair with just direction and speed or it can give you control over all the DCC functions, accessories etc. A DCC system has only one Command Station, but it can have multiple throttles. Some systems, usually starter ones, combine a Command Station and a throttle into one box. This is great, but what happens to it when you out grow your starter kit? NCE have thought this through. The PowerCab unit works as a Command Station and a throttle when it is plugged into the PCP (Power Cab Power) pannel, which is supplied with the started kit. However, the PowerCab doesn't have to be a Command Station, it can be just a throttle, so when my mate brings his PowerCab round and plugs it into my system it plays nice and doesn't try and be the CS, it just controls the trains. When used in this way NCE refer to it as a Pro Cab. The PCP has two inputs on the front. One for a PowerCab and one for a second throttle, in my case I have a Cab04. On the back there is an output for UTP. UTP's can be placed round the system so you can plug a throttle in at convenient location. This is all great, but here come the limitations... A PowerCab plugged into the PCP is a Command Station, this has to be plugged in all the time because it is the track power supply, if you unplug it, everything stops. A second throttle can be moved from the PCP to a UTP without a problem, but the PowerCab must stay put. I don't think this point is made clear in the manual. Second, and something I certainly didn't get form the manual, a PowerCab system is limited to two throttles. You can only have your PowerCab and one other throttle attached to your system, no matter how may UTP's you may have. If you want more you need to buy a SB-3a Smart Booster which will allow up to 4 throttles (it is also a Command Station, so your PowerCab can be used as a ProCab and be moved around UTPs). Other NCE kit will allow more than 4 throttles, but you're heading into club setups at this stage. Getting back to your question of how do I have three operators. I have the PowerCab plugged into the PCP and into the second port I have the USB Computer Interface (which the system sees as a throttle) linked to an old PC. On the PC I have JMRI (Java Model Railway Interface) software which is free and this allows me to have several throttles on the screen at one time. Multiple throttles on one screen is not massively practical seen as there is still only one mouse an thus one operator. If you have old lap tops hanging around (or your friends bring their own) these can be added via a wireless network, but that isn't very practical in the garden. I'm in the fortunate position of owning an iPod Touch and there is an "App" for the JMRI software which enables me to control trains (and points, even routes!) wirelessly form my iPod. In fact all my mates who come round for running sessions have an iPod Touch or an iPhone so we can all have our own throttles, there are basically no limits on the number. In my opinion, the iPhone app makes an easier to use throttle than the PowerCab, especially for controlling points. The great thing about this is the cost. I already had an old PC, an iPod and a wireless network so the only costs were the USB interface, £35, and the App, £5.99. There's even a free version of the App which my mates use, it's missing some of the advanced functions but it controls trains. You don't really need the old PC, if you have a laptop all the better, I use the old PC because it can be permanently set up in the shed and I don't have to stop my wife from using the (her) laptop. Anyway, I hope my description of the NCE system helps. I took me a while to figure it all out and I'm probably still wrong about some of the stuff, but I heartily recommend them for DCC.
-
I've been away for a day or two and loads is discussed. Just to jump in. I run the NCE PowerCab and I love TCS chips. Admittedly, the only other chips I've used are Hornby, but I've been removing them and giving them away (one went into a Bachmann Class 25!) because the TCS ones are much better. I've used TCS T1 and T4X chips. Seen as you are not going to use the 2 functions then the direct plug DP2X is exactly what you want. I also thought I'd need a booster at some point. But so far, even with 3 operators I've not had any power issues. I'll see how things develop as Amblethopre grows.
-
I'm making use of computer network cables on my layout. I'm fortunate enough to have a drum of the stuff they use to wire up a building, which is 8 wire solid core and I can make the wires as long as I need them. In a couple of places I'm using the "fly leads" to plug into network ports culled from old computer bits.
-
Another session in the shed and I now have some very tidy wiring of an accessory decoder and 5 point motors. I've even gone to the trouble of using cable ties and soldering tag strips. The soldering is still more of a foe than a friend, but that's probably because I'm rushing and I was using some heavy gauge wire in a couple of places.
-

FAULCONWOOD AND SPRINGBRIDGE RAILWAY.
chris replied to cleanerg6e's topic in Members Garden Railways
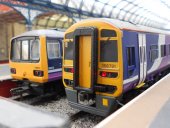
Iain, working on the principle of "no question is too stupid to ask" but are you sure that they are all Electrofrog, I was amazed at how similar Insufrong points are. I've attached a photo (taken by my web cam {no need to get excited Mick}) of both types.
-
Managed to get to the B & Q in York which stocks Gypframe, so I now have all I need to get going on phase 3 of Amblethorpe. I've put the Greenhouse shelf brakets on the fence posts and now I have to work out what features I want along that side of the garden. A through station is a must, I also like the idea of the railway passing over a river. Both of these will require some thought before I lay the baseboards.
-
Finally got an accessory decoder to throw a pair of points consistently. I had been wiring them in series, because Ohm's Law suggested it was the correct way. However Ohm didn't know what he was talking about (or more likely I have no idea how to employ his wisdom) cos they worked great in parallel Cannot express the sense of achievement and relief I now feel over the matter. I have renewed vigur to get all the points motorised and route control computerised. But there is a lot of wiring to do now.
-
Not been cracking on lately. Strange that these long summer nights seem to be taken up by other activities (just to about tot go for a bike ride and then stop for a bar meal). I purchased a Team Digital accessory decoder at the York Show (there were some grate american layouts there) and I've been playing with that. The chap from Digitrains assured me that it's built in CDU would be able to throw a pair of points, but i've not managed to get it to do it yet! I've also been applying some paint to some of my hornby train set models i've had in the loft for 30 years. The plan was to make use of them for the time being until I'd got bought some proper models. But the careful application of paint and the bringing together of two different station building has created something that looks rather good, so it may become a more permanent feature of Amblethopre. Almost purchased a camera on Tuesday. Almost.
-
And while I'm on, I'm glad I had a moan about losing my peco track rubber back in January, if I hand't then this topic may not have been started and I wouldn't have found out about the wonders of Garryflex. Lets all keep mentioning the small things, you never know where they'll lead.
-
I picked up a Garryflex at the York Show and I must say I'm impressed. Just a gentle rub of the track and it's as shiny as new. The large block size means I can easily clean 4 rails at once. Strangely I found track cleaning a pleasurable experience, enjoyable in it's own right! The deposites left behind are a bit of an issue, but a damp cloth should sort that out. I've just tried it out on my Scalextric track and it does a brilliant job. "Dark track" on Scalextric is a real issue and common advice is to throw it away, but the Garryflex has cleaned up the dark track nicely.
-
Hampton Field Railway, Wiltshire. Potted history
chris replied to ba14eagle's topic in Members Garden Railways
Running more than one train on a single line isn't too much of a problem for me, It's running more than one train on a single controller that gets me confused. If a train is associated with a particular controller then I'm OK keeping an I eye on it's speed and direction, but If I have to switch between loco's on one controller then things invariably go wrong, and I end up looking at the run loco and wondering why it isn't responding to commands, usually while the one I'm actually controlling is heading for a crash. -
FAULCONWOOD AND SPRINGBRIDGE RAILWAY.
chris replied to cleanerg6e's topic in Members Garden Railways
I also run the NCE system, just the basic PowerCab starter kit. The wireless system isn't licensed in the UK and it would cost NCE too much for them to get it passed by the UK radio regulators for them to bother. As I've said on the Amblethorpe thread, I have utilised a lot of old computer kit I had stored in the loft to enable me to be able to run wireless control on my iPod Touch via my NCE system and that is now my preferred way of controlling trains, points and most importantly routes. -
The B&Q we went to didn't stock Gypframe but I did get roofing felt and guttering for the shed. The felt went on on friday and I've put the gutting up today. No advancement to the railway, but it will keep a lot of water away from areas I don't want it. They were also the top two things on my to do list. York Show tomorrow. Must right a shopping list.
-
Martin, I'll look into RocRail. I'll need to check how it works with my particular NCE DCC setup.
-
I wrote a to do list last week and I'm surprised how useful it's been. As mentioned elsewhere, my 156 is back from the workbench with working lights, and I've now finally got round to gluing the legs on to my station roof so Colwick Station is just waiting for the fine detailing stuff. I'm helping my mate Jonathan to build a shed (24' by 4'6") for his garden railway and we've got a trip to B&Q planned so I'll pick up some Gypframe and then I'll be able to start on Phase 3. It's the York Show at the weekend. I'm planning on going on Monday, if anyone else is popping up and what to meet up then give me a shout. I can make it any of the three days. I'm hoping to buy a couple of accessory decoders to control the dozen points I've got which haven't been sorted yet.
-
Finished off the trailer car today. Checked everything at every stage and the only thing I hade to de-solder was one of the pick ups I'd fashioned on the one wheel set. The wire was of too heavy gauge so I swapped it for something more suitable. The function only decoded went in with no problems and the only real issue was hiding all the wires from view once the roof went back on. I really appreciated my computer connection today. Using the Decoder Pro software to sort out all the CV settings was a breeze. It took longer to boot up the computer than it took to set up the decoder. I'm very happy with the lights on the 156. The head lights are probably a bit too bright compared to the prototype, but when running outdoors in lovely sunny weather then it's rather helpful to be able to see which lights are on.
-
If I were you I'd do some testing. What I'd do is wire things up so one switch throws both motors and then see if they are both thrown every time. If they are then you are correct in your assumption that they need to be thrown at exactly the same time. If you still get intermittent throwing then the CDU doesn't have enough grunt. It's a bit of pain testing in this way, but I find that I learn a lot through this kind of process.
-
Actually Mick, I was being obsessively careful. Apart from the polarity side, which is where I came unstuck. I think the confusion came from the fact that on a DCC chip the function wires (yellow, white, green etc) are actually the return wires and the single blue wire is the "power". I'm used to working the other way round, where the return wire is ground. This confusion was reenforced by the diagram I was working from which had the resistors between the LEDs and their function wires and the instructions that came with the LEDs said the resistor should go on the anode (+ve) side. Lesson 1 of my electronics degree was the diode. If only I'd paid attention and learn the difference between the Anode and the Cathode. And who's silly idea was it to call them Anode and Cathode rather than positive and negative, or even "in" and "out" seen as they are a one way device. I'll be obsessively careful about polarity from now on.
-
Got all five LEDs in one car, popped it on the track, selected the loco number, turned on the headlights and nothing. To test I'd got the number right and I wasn't on a dead spot I drove the train forward and reversed it back and still no lights. Switched the multimeter to 20Volts and applied the probes. -12v. Diodes don't work when they are the wrong way round, it's their defining characteristic. So they all came back out and then after a frustrating hour or de-soldering and re-soldering I return the unit to the track and this time, with great relief the lights operated as expected. Unfortunately I'd being working on both units at the same time so i've the same issue with the other end.
-
I've finally got everything I need to put lights in to my Hornby (Lima) Settle to Carlisle 156. I'm following the excellent guides from Martin Claydon specifically this one http://s110605900.websitehome.co.uk/class156dcc/ On the whole the 156 comes apart very pleasingly, so access isn't much of a problem. I e-mailed Martin before I started and he suggested that I used tiny "nano" LEDs for the running lights. I fitted these last night and had to use tweezers! Still got lots to do, but I will have a go at getting photos at some point.
-
A friend gave me an old Mac which should have been able to interface with my DCC system, but I couldn't get it to work. I think the Mac may have been USB2 and the interface USB2. Rather than waste time I've given in and I'm using an old Windows XP box I use for Race Management of Scalextric. The Advantage of that PC is that it has two Video Cards in it so I can run up to three monitors on it at once. I spent an hour in the shed yesterday getting it ready for the PC and I now have a suitable shelf for two monitors, which should be enough screen space for the JMRI software, for now. All the above mentioned computer equipment has been given to me when other people have upgraded their kit, I always accept old computers and peripherals when they are offered to me. One random peripheral which I received a month ago is a battery back up which can keep a PC going for half an hour when there's a blackout. I hadn't done anything with it because I was missing a power lead, but on the off chance I asked a fellow computer bits hoarder if he had one and the answer was yes. The lead needed the socket removing from one end and replacing with a stand 13 amp one, but with that done I now have mains power in my shed without having to run an extension lead out to it. The battery doesn't have much power, but it's enough for lights (extremely handy) and my radio. I think I could probably run the railway on it, but I haven't tried and that's not really the point, but it will be useful for a quick test of something. The battery will need recharging, but that can be done each time I have the extension lead out.
-
Mick, I know where you are coming from. Colwick Station has taken a huge amount of time to build, but it was the addition of the buffer stops and a small fence behind them which made all the difference and gave the most satisfaction. The buffers where cut down from the peco kit and then painted black, red and white (by my wife) and the fence was scratch built out of white plasticard strip. These simple additions really make a different to the kit built stuff that make up the rest of the station. I also agree with you about the Kirkfield and Warmthorpe Railway, a great source of ideas and inspiration. Sound isn't on my agenda yet. I friend has a DRS Class 20 which he's going to put sound into and I'll see what that sounds like on Amblethore,
-
My dad is a keen photographer and has a "spare" camera, so I'll borrow that next week when they've returned from Africa
-
Hi Ian, I planted a few today! I had to pop into York on Friday to purchase a staple gun so I could repair the felt on the shed roof that had blown off the day before (for some reason I had some spare felt kicking around ) and I also picked up a hot glue gun and a few other bits and bobs. This morning I put together three packs Peco fencing and then attempted to attached it to the side of my base board with the staple gun. But the gun was far to powerful and the staples sliced through the "legs" of the fence. This meant a far slower process of nailing them in place with track pins was required. With the first pin in place the heaviest shower of the day hit ONce the sun was back I finished off the job with Peco brass track pins, which I must say are very good. With a few metres of fence in place I added several bits of scourers to dress it, reverting to the staple gun to affix them. The effect is nice, but it's a bit strange having scenic elements having got used to the bare appearance of track on roofing felt. Recently I have been busy completing my first bit of modelling. Colwick Station is a three platform terminus. Platform one is 2 metres long and can hold a 5+2 HST, platform 2 is 1.3m and can hold a four car DMU and Plat 3 a three car (four but its blocking the points for the turn stabling siding). I have a 1 metre long Peco overall roof covering half of plat 1 and most of 2. The platforms are made of 15mm chipboard and are dressed with a Metcalfe platform kit. The station building is also Metcalfe and it sits across the terminus end. This has all been constructed on the removable section baseboard which has spent the winter in the conservatory. I'm very happy with the results and once I've finished off some of the finer detailing and I get a day without the threat of a shower I'll finally have a station to run a train into. I've really enjoyed the modelling of the station and my skills and confidence has grown as I've progressed. Once Colwick is completed I think the next task on the todo list is to motorise the 5 points which are permanently outside, I've procrastinated long enough. Then it will be time for phase 3 when the tracks will burst out of the far side of the shed and head back down the right hand side of the garden.
-
Couldn't find any in York's pound shops and Boyes only had coloured ones. Wilkinsons is at an out of town shopping centre on the otherside of the city (near Maplin!) and as a non driver I don't get over there too often. So when I came across a Wilko in Chestaer I purchased lots! Popped into my local Tesos this morning (my annual visit) and purchased a pack, they were a bit pricy, but an all important different shade, I'll get someone else to pick me up a few more packs. I guess it's time I invest a the hot glue gun. Tearing them is a top tip, thanks Ian.
