chris
-
Posts
1,256 -
Joined
-
Last visited
-
Days Won
78
Content Type
Profiles
Forums
Gallery
Everything posted by chris
-
There is scope for that kind of setup on the route that is leaving the shed. But the one out in the wilds would require extra electronics under the baseboard or a 10 meter long cable run from the shed. I've thought about putting power cutting sensors around my two lift out sections, but never got round to doing it. Since I've got back into electronics it would be easy enough to achieve. I could inter-lock my turnouts with the lift out section so they couldn't be set that way when it is not there. It's do able, but I fear every other time I set it up the detector would fail to detect the lift out section and I wouldn't be able to set my turnouts.😅
-
This one sentence describes the majority of the stuff I do with model railways.
-
All my points are controlled via DCC accessory decoders. But I control them via JMRI, so its a click with a mouse or a tap on an iPhone/iPad. Throwing them isn't a problem. Ensuring that they have thrown properly, via my car door lock motors and rickety link mechanism is more of an issue. My thinking is that I can remove the throwing of turnouts on the line that I'm crossing. This will mean that a movement across the line will leave it unaffected. So as long as I don't run trains into each other I can crossover the line without changing it's route. At the moment the Monday running sessions rarely amount to more than two trains looping round and chaps chatting a lot. This means that no one is paying much attention to controlling their trains. It is wholly incumbent on the person driving a with a conflicting movement to set their route, drive their train through the conflict area and reset the route for the other trains. I should be able to change my track layout so this kind of manoeuvre only requires the change of one turnout. This should mean that adding in an extra train while two trains are looping round is easier and therefore happening more often. Trains might start to reach my two terminus stations.
-
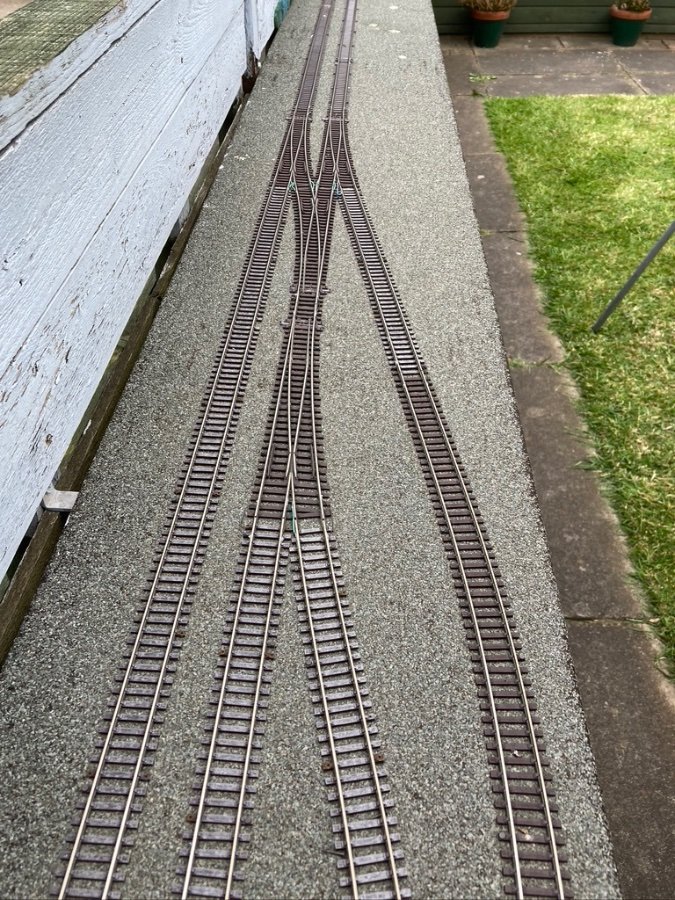
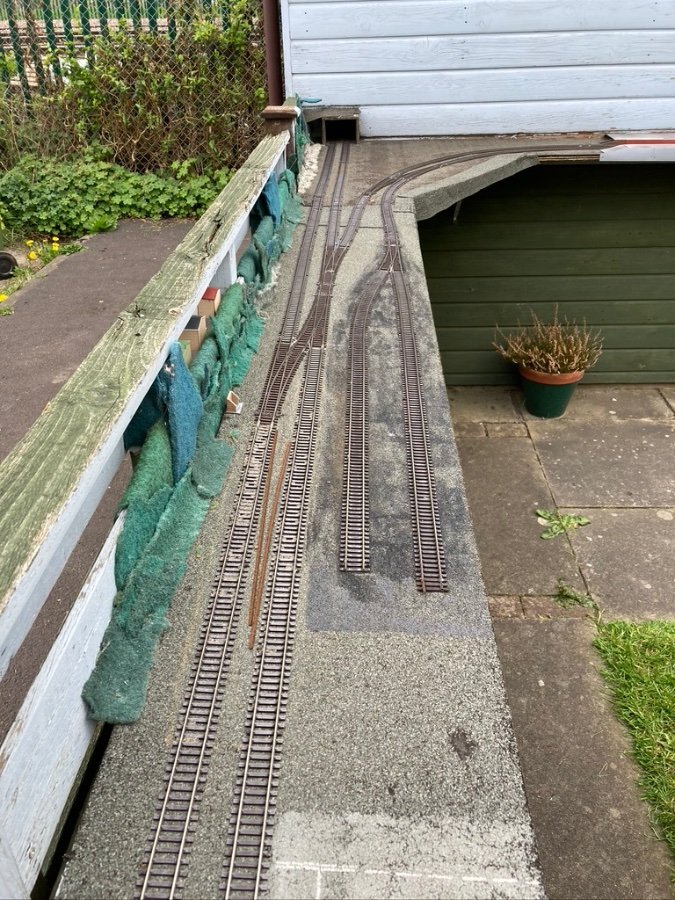
I'm thinking about changing a couple of the junctions on Amblethorpe. I've built my junctions in the modern style with turnouts rather than using (diamond) crossings. The problem is that I have to change three sets of points to enable one train move, and then change them back again before a train approaches on the other line. A crossing would mean that I don't have to worry about resetting for the other line. A friend has pointed out that rather than a crossing I could use a single slip. This can be left in the crossing position and only changed when I need a train to crossover from the down to the up line on the left hand pair. Another junction may also be changed. The ladder on here also means that the down line turnout has to be changed for an up line train to reach Amblethorpe Station. This could go single slip, which would allow a train to crossover from up to down. Or a crossing could be used and the points rearranged to allow trains to enter the station, but not crossover between tracks. I occasionally use that as a crossover, but mainly at the end of day when I'm putting trains back into the shed sidings. May mate is going to buy me a single slip, so I guess one or both of these changes will be occurring.

-
I'm not aware of any displays that are small enough for a headcode box in OO, but it's definitely doable in O. Could be changed via a DCC command. Great idea.
-
We've not discussed track much on here. Peco works fine, get on with it.... However. 12 years in. some of my sleepers are looking rather white. It hasn't effected the points, which are off a similar vintage. I'm assuming its an UV issue because it's only happened to lengths of rail that are on the sunny side of the railway. The track section on the right here has been out for nearly 8 years, rather than 12.
-
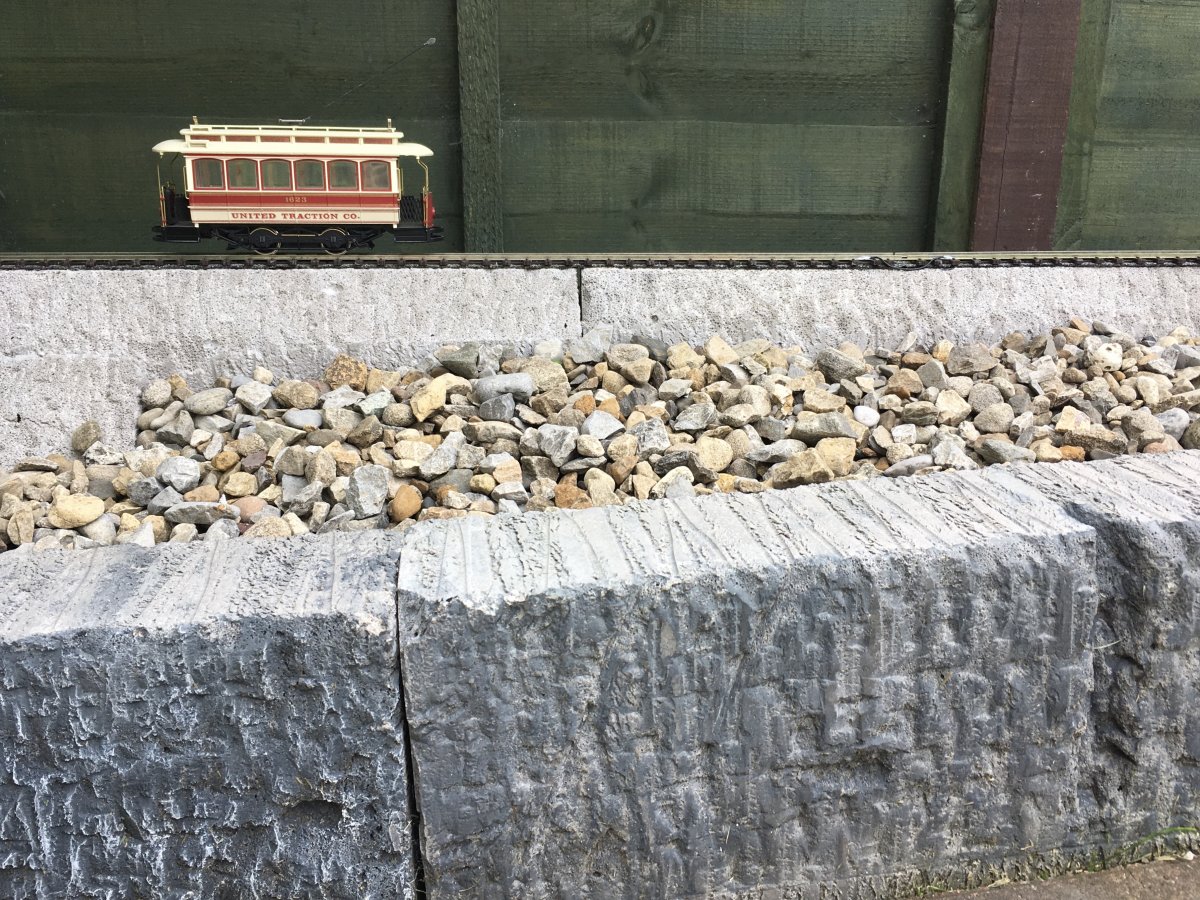
Although Ledston Tramway looks the same, I've done a lot of work under the baseboards. When laying the track I wired it so I could later add train (tram) detection. This was always prohibitively expensive. That was until I came across Arduino Microcontrollers. I Joined MERG to enable me to purchase cheap train detection kits (£3 per block). For less than £100 I had 18 separate detection blocks on the tramway and a few other bells and whistles, namely a Layout Control Bus. This time last year I played around with JMRI automation, but couldn't quite crack it. I got distracted with other things, but I've come back to it this week. Rather than trying to automate the whole tramway in one hit, I'm starting with some simple functionality, points changing automatically after a tram has cleared them. The next step is to have the trams stopping and starting automatically, but that will require writing code in a language I'm not familiar with. I'm going to upgrade the fairground. The merry-go-round is motorised, but it's an AC motor which is limited to on/off. I'd like it to been able to speed up and slow down so I'm planning on replacing the motor. I have a Cakewalk, which I'd like to motorise. But the big challenge I've set myself is to build a working Steam Yacht ride. I've made a start. I've designed the A frame to be 3D printed and I'm building the steps out of card and StripStyrene. Not sure how I'm going to make the "yachts" yet!
-
Your railway is looking lovely. Great video.
-
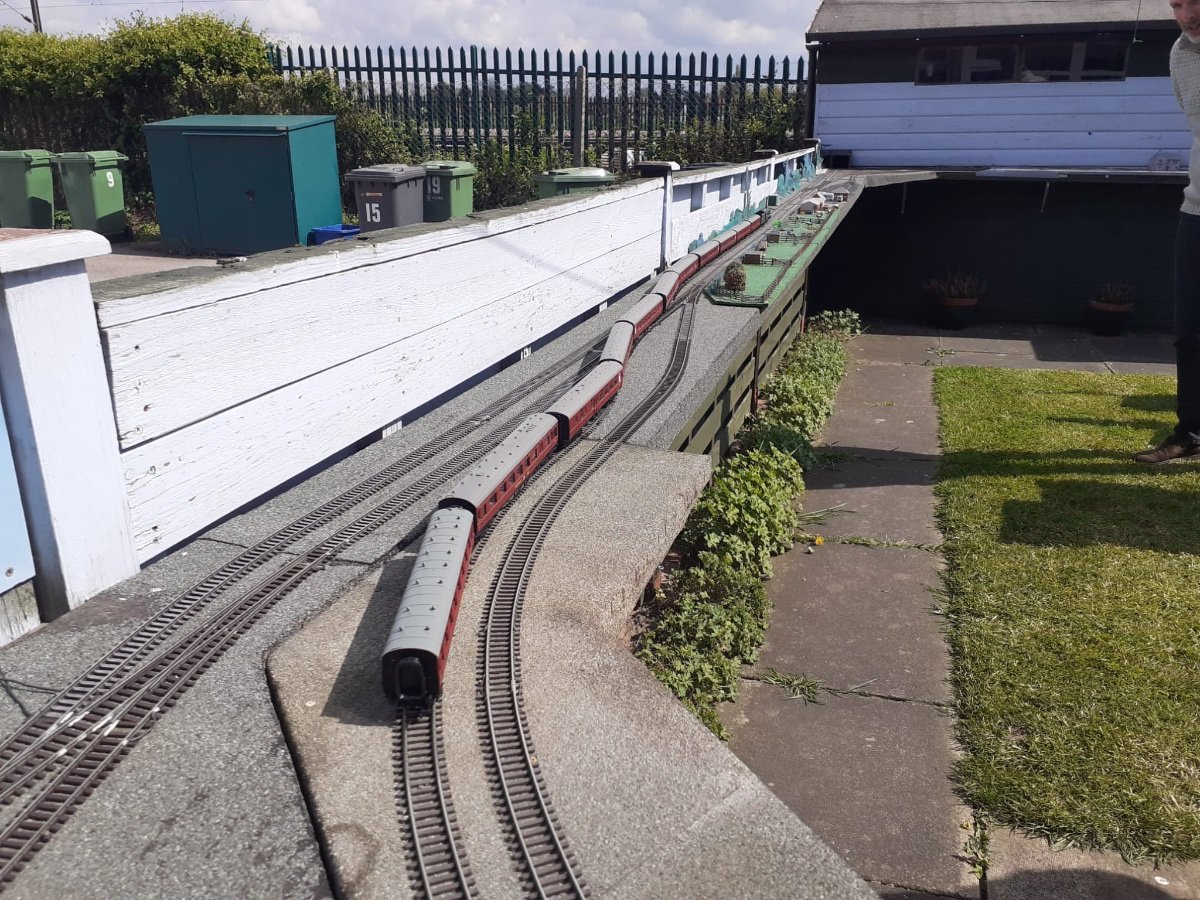
We are trying to develop a habit of a Monday running session. More visiting stock today. A mate brought the stock for an early 1960s Leeds to Glasgow service. At 11 coaches I think it is a new record for longest train to run on Amblethorpe. It took a few laps before we could leave it to run un attended. My usual trick worked. When a coach is derailing, turn it round. Running it in the opposite direction tends to fix issues with bogies or couplings.
-
In 2021 I got back into electronics. Micro-controllers have come a long way since I last used them 30 years ago. Now they are very cheap and fully programmable using some code and a USB lead. Basically put, you plug in inputs (switches, push buttons, sensors) and they then control outputs (LEDs, motors, relays). I added some infra red sensors to my Snicketway to enable some automatic running of the Trolley cars. I’ve replaced the Accessory Decoders and Seep point motors on my Tramway with Arduino’s and Servos. Aside from the fun of getting it to work, it’s cheap. DCC Accy Decoders workout at about £10 per point. Their replacement Arduino can get this down to £2. Servos are also cheap at a couple of quid. I’ve not motorised the points (turnouts) on the Paltyville Ridge and Peak Railroad. This year I will and I’ll be using Arduino’s and servos. The turnouts will be operated via iPhone or local push buttons. The servos may need some waterproofing, but at the cost I won’t worry too much if I have to replace them from time to time.
-
Had some visitors this week. Not my usual period. That said, Scotsman is pulling the Northern Belle rake. And Colwick came out for a play.
-
Amblethorpe’s 2022 running season has begun. My traditional start at the switch to British Summer Time was followed. Me and my modelling mates are going to try and for a better habit this year. We have pencilled in Monday afternoons for running sessions. If the weather is against us we can switch to my mates loft layout a couple of minutes away. Relativitly painless start to running. Only one bond needed resoldering. ONe Accessory decodered wasn’t working so a couple of points weren’t throwing. I had a spare decoder so swapped it in. Still didn’t work. Reasoning that it was the DCC feed that was the problem I replaced the P clip connectors with Wago connectors and I was back to full control. As I did this I did manage to yank a couple of wires off solder pads, so the iron was required. Never a fun time under the baseboard outside. At some point this summer I will have to finally do something about about a couple of sections of baseboards that are knackered. One is the last bit of original board which has been out in the garden for 12 years. The other is about 8 years old. Not sure if it was the quality of the ply or the roofing felt which has led to the extreme delaminating. I’ve got a 8’ by 4’ 18mm ply sheet this time last year and have plenty of roofing felt. Just got to get round to it now.
-
I feel your pain. My Spring challenge is to get my intermodal train looping without derailments.
-
Don't worry about the space. My Paltryville Ridge & Peak Railroad is in an L about that size. The fun of garden railway is as much about the building of them as it is the running of trains. Best of luck.
-
Good to hear from you Griff. All the best for your new garden project.
-
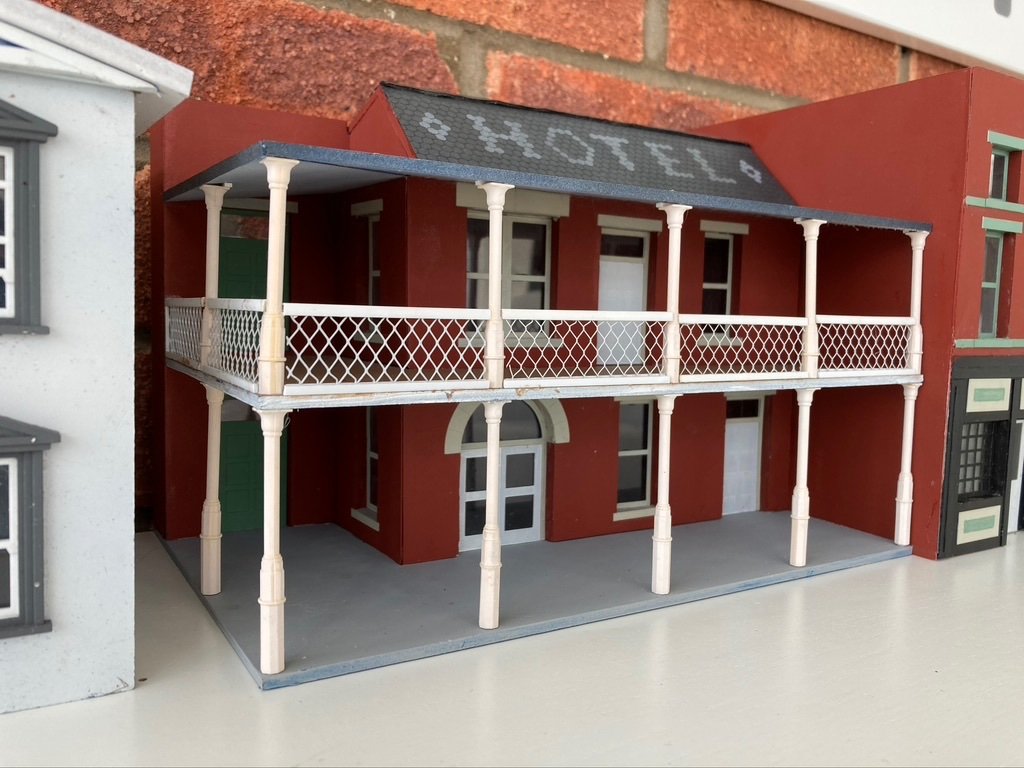
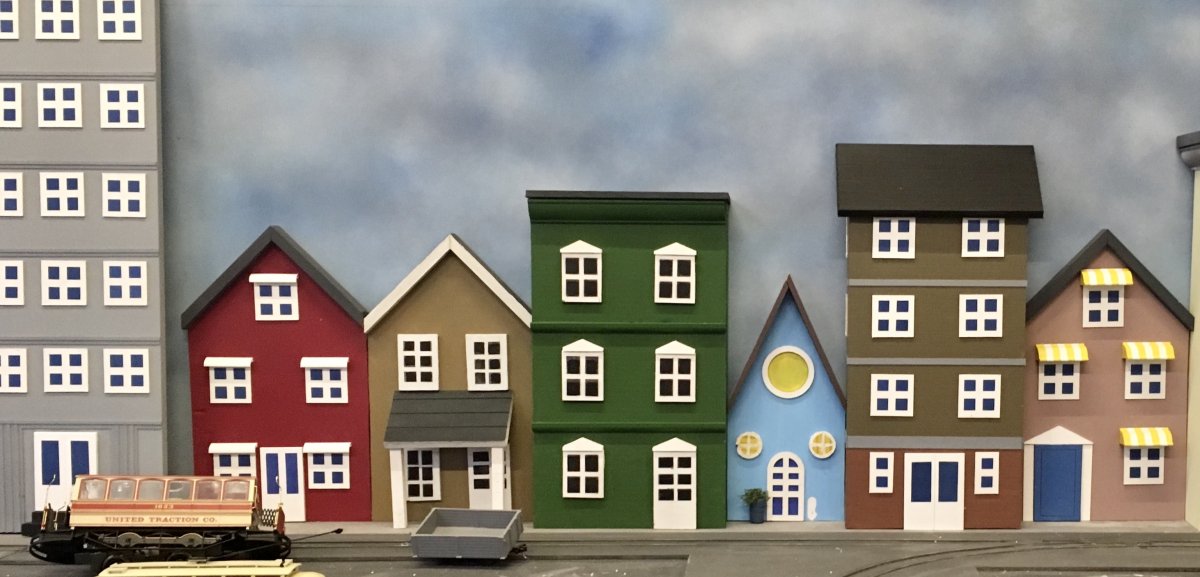
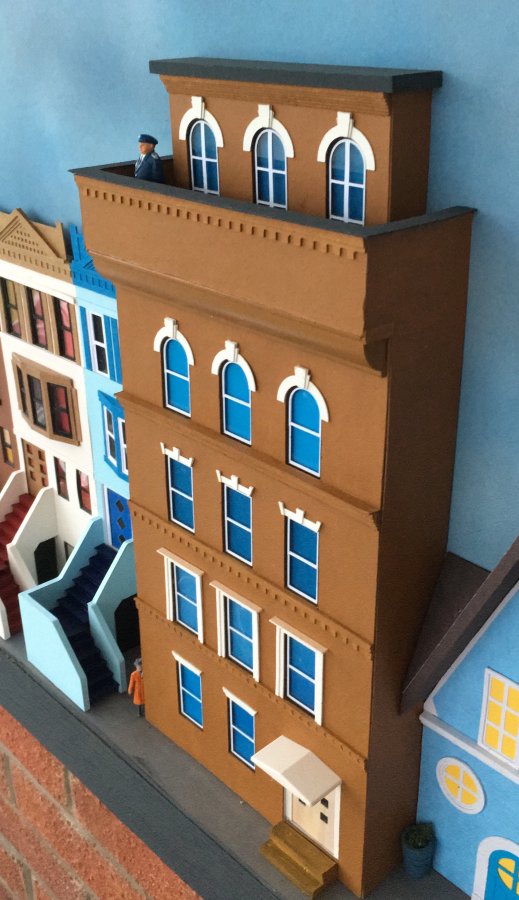
Scratch built some buildings for the PR&PR. It On30 so they are bigger, but they are plastic so they can live outside. I developed a new technique. I use a 4mm thick sheet of clear acrylic the size of the front wall. The walll has its doors and window apertures cut out and then stuck to the acrylic. Doors and window frames are cut to size out of very thin styrene using my plotter cutter. I paint them and stick them to the clear acrylic. The hotel was a bit more involved. The columns were from a Peco OO station roof kit. The balcony railing is metal mesh, which may rust! The roof is black styrene, the tile pattern was scored by the plotter cutter, with HOTEL painted by hand. And the trim on the adjoining building was made on my mates new 3D printer.
-
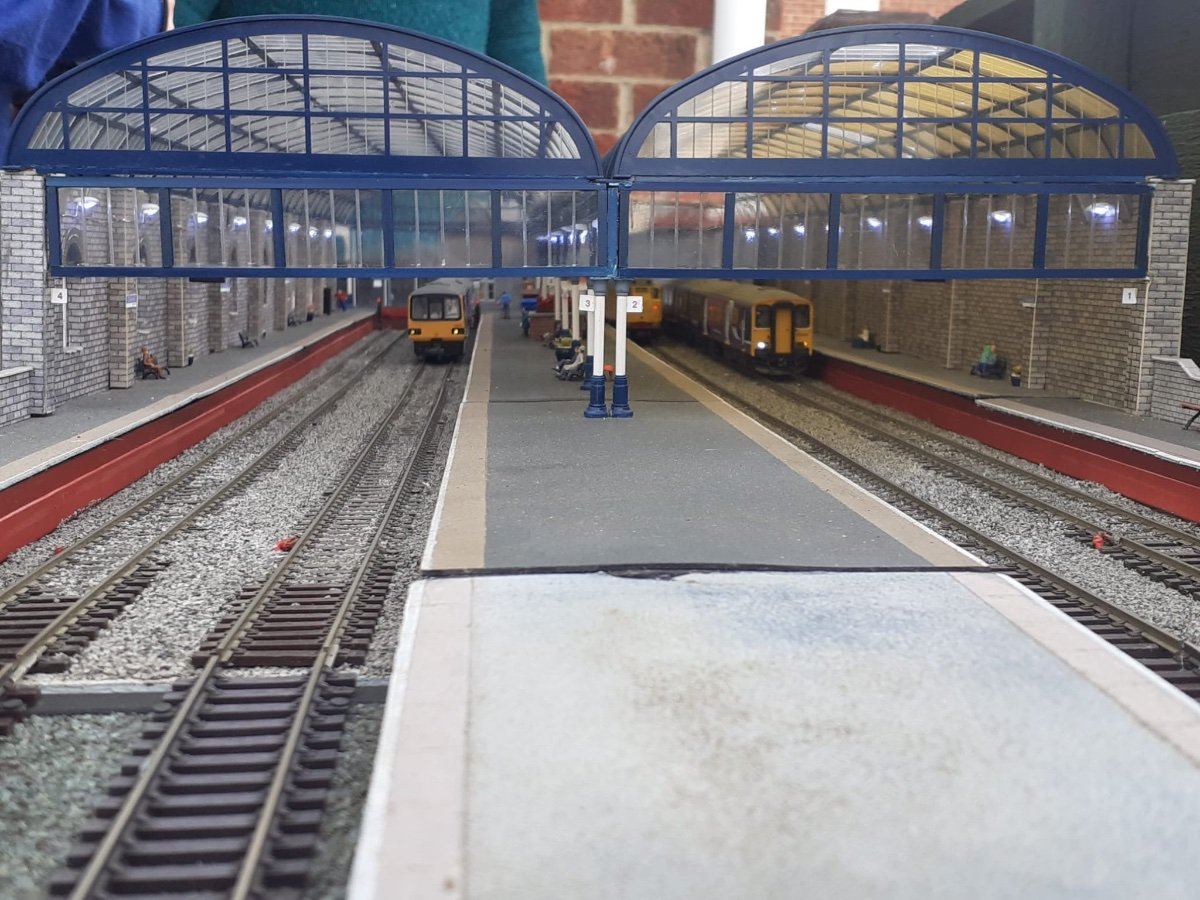
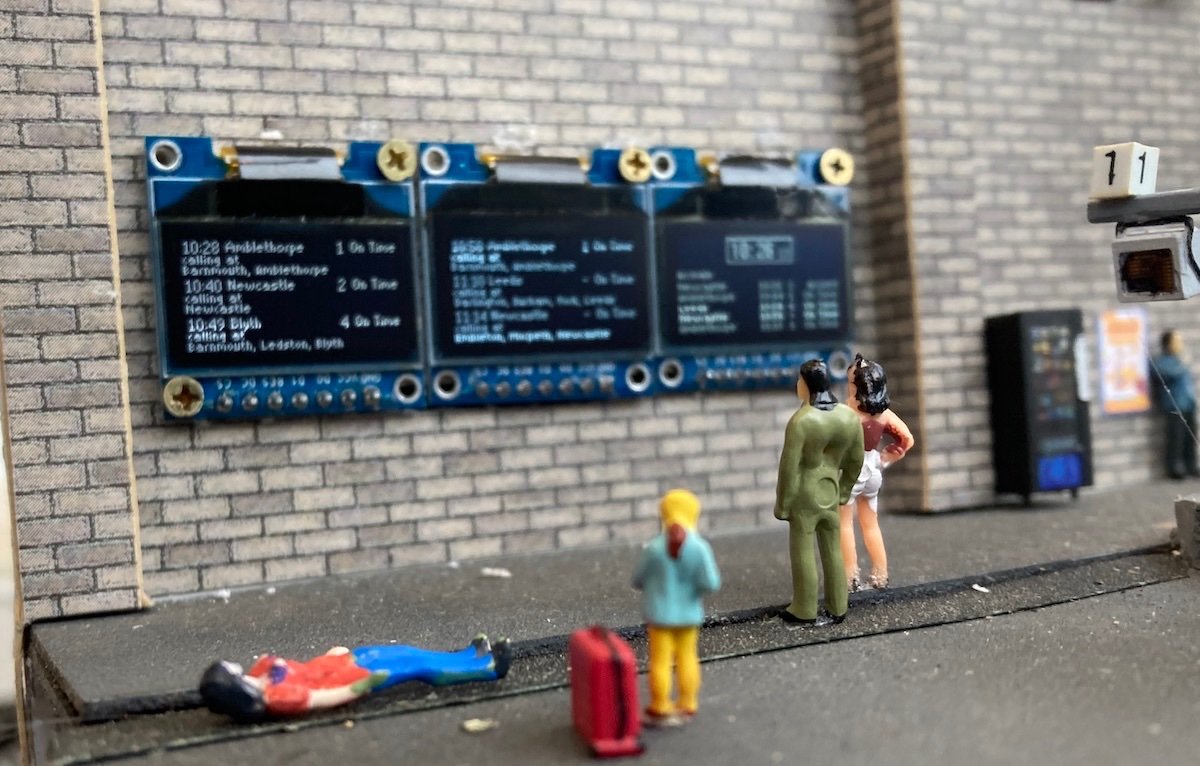
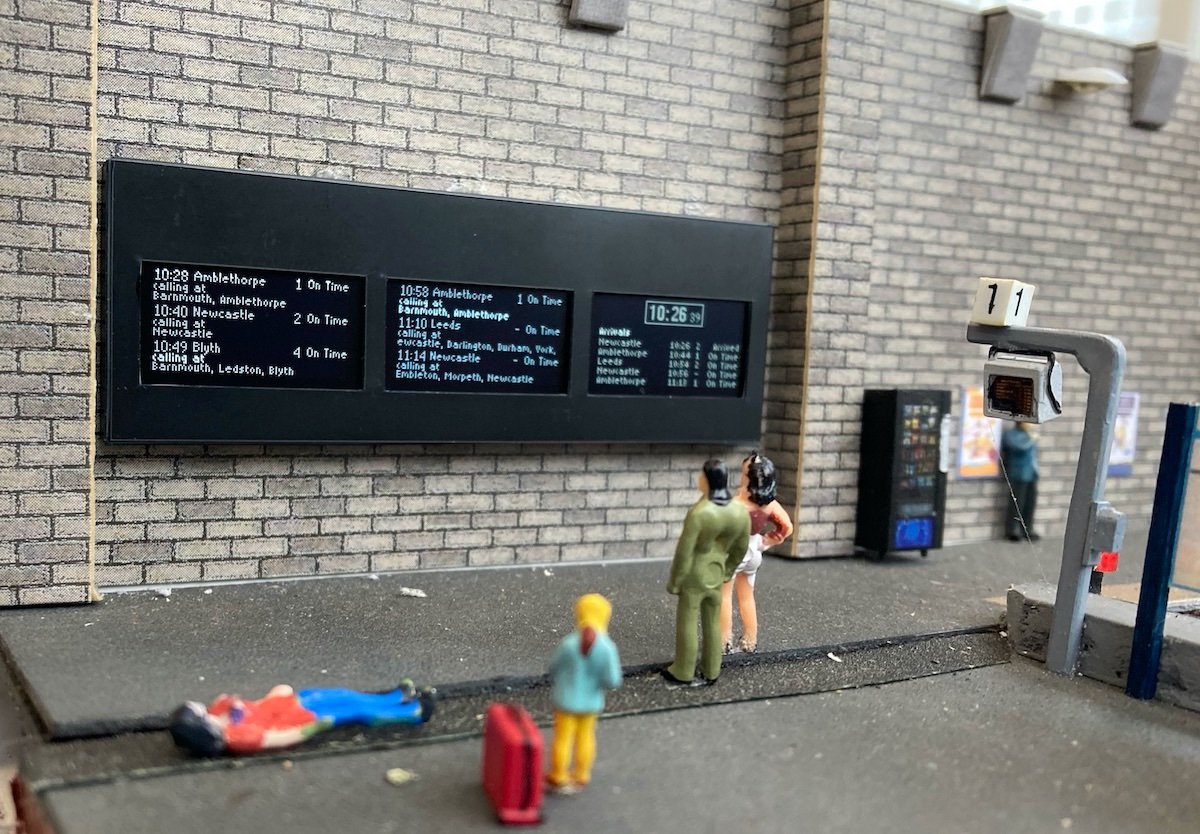
Getting the text small enough for OO was the big challenge. I basically had to forge my own fonts. They are still too big for a platform monitor, but work well as a main display board. It has amazed me how cheap electronic components are these days. I've built a panel for a mate that controls 16 points, servos as point motors, has push buttons to throw the points, and LEDs to show their positions. Can set a routes and be linked to a computer for remote operation. Whole thing cost about £60. To teach myself how to program an Arduino I built myself a test track. This shuttled my tram back and forth, change a point and the signals protecting the point. Sensors detected when the tram was reaching the end of the track, slowed it to a stop and then reversed it and sent it on its way. All fully automatic, now user interaction required. I even upgraded it to run two trams shuttling back and forth alternating which branch of the point they took. You're right when you say its mind blowing.
-
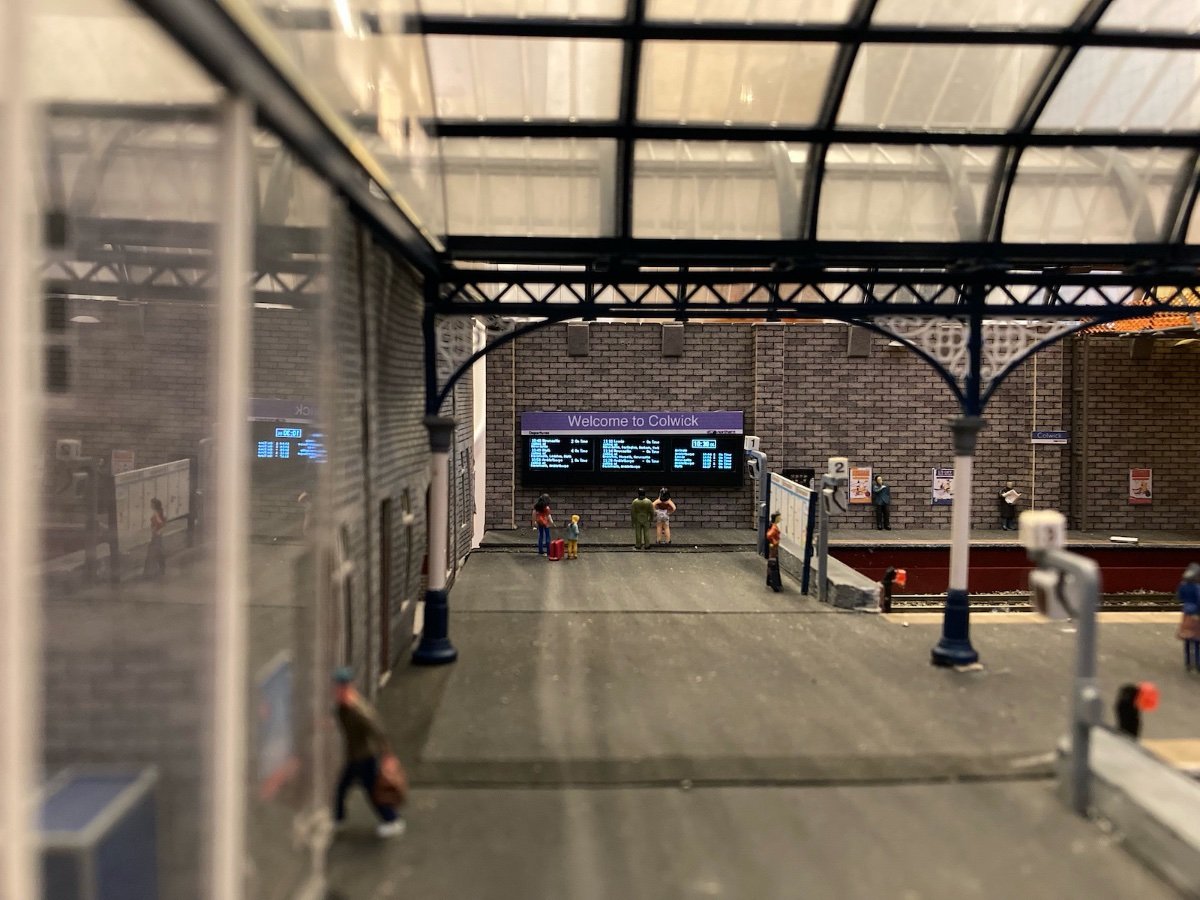
Throughout 2021 I was working on the electronics side of our hobby. Although I have a background in electronics I was out of date, and the Arduino revolution had completely passed me by. I've been playing catch up. But this has mainly been on my indoor projects. My first project on Amblethorpe is a passenger information display for Colwick Station. It shows "live" train information, but it's of fake trains. I've not connected it up to sensors on the track so it is not triggered by the coming and goings. This is possible, but I don't run Amblethorpe to a timetable so there is no point trying to do it. There are 3 screens each 22mm by 11mm with 128*64 pixels to play with. The type is tiny, either 6px or 5px high. They cost £6.50 per screen. They are dynamic, with some trains randomly delayed or cancelled. The clock ticks off the seconds minutes and hours. The destination stops scroll across the screen when required. These 3 are driven by a single Arduino micro controller, which cost £3.50. it all runs on 5 volts, and this can be pulled off the DCC track bus using a two quid voltage regulator. So the whole thing cost £25. I used my plotter cutter to make a hosing out of black styrene. It's a bit bulky, but I hid most of it by placing a Welcome to Colwick sign on the top. This year I'll get round to motoring the points on the Paltyville Ridge & Peak Railroad using and Arduino to provide the control and frog juicing.
-

7 x 4.3m garden track plan
chris replied to Clay Mills Junction's topic in Layouts In the Planning Stage
I run with JMRI, but with a NCE PowerCab as the command station. Old phones as throttles and an old iPad as the signal box. I run it on it's own wifi network provided by a retired broadband router now living in the shed. No problems with signal range or interference from traffic on the home wifi. It all works well and friends can join the network with their phones and get driving. Handy in these COVID times when you don't want to be handing things around. -
Our On30 railroads are taking very simmer routes. May be i'm following you down the scavenger path. On my garden railway I have two areas of baseboard that need replacing. I really should crack on with it. You're beyond repair message is a warning to me.
-
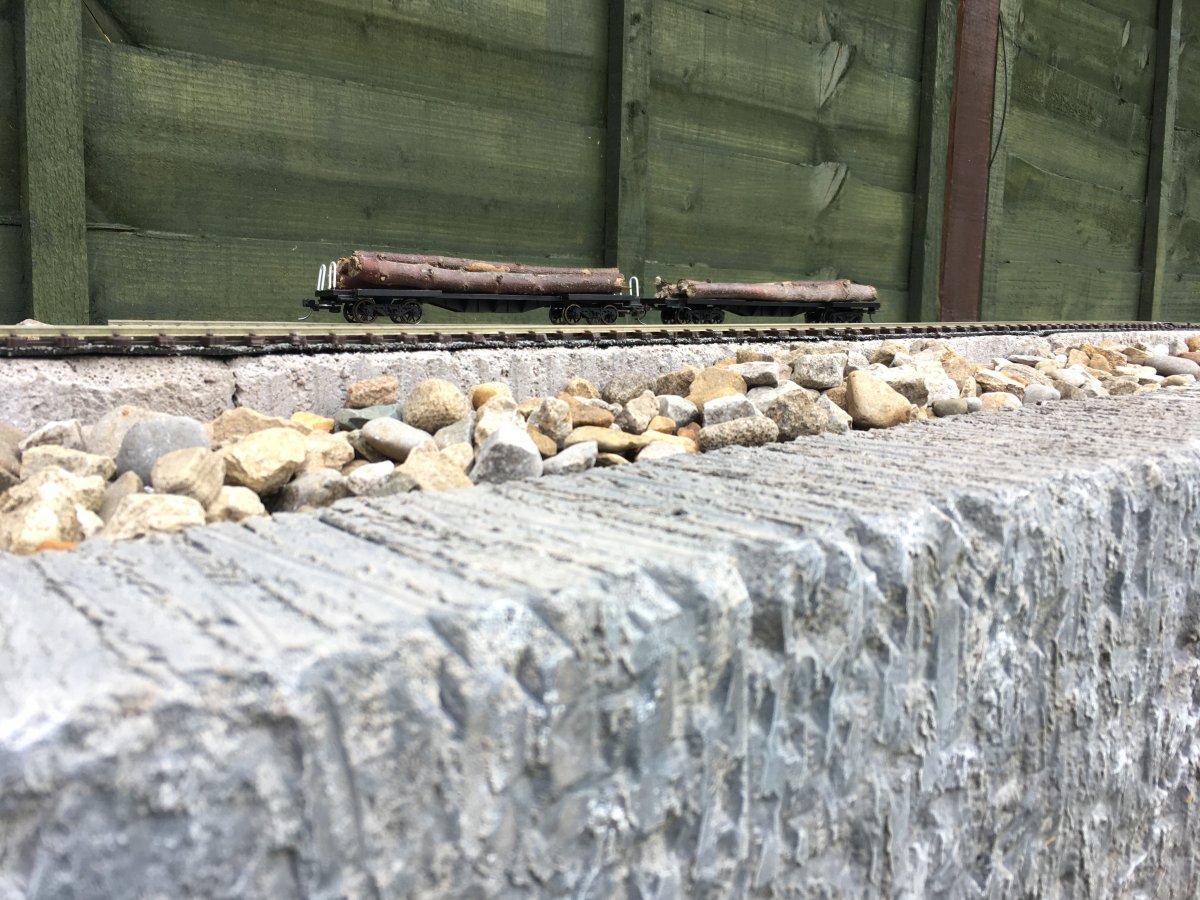
Spent a bit of time sorting the Kadee's on my rolling stock so they are at the correct height for the magnetic uncouplers. The easiest option for some stock was to rewheel them. Had a play. Uncoupling and shunting wagons is a lot easier. It is fun rather than frustrating. Some branches I've had lying around the garden for 3 years finally got chopped to length for my logging cars. I connected up my Snicket Way baseboards and ran onto them. Turns out the track power connector between the two layouts is wired the wrong way wound. My red rail at the front, black at the back rule should prevent this kind of cockup, I'll have to figure out what I've got mixed up. Its a 2 minute fix with the soldering iron. With the recent DCCing of my Porter it was its first run on the 20cm (8") curves of the Snicket Way. There were no issues. I'm currently thinking about the buildings for Paltryville. They need to be weather proof. Mainly because I'm running out of space to store all of my moveable scenery. From this photo it appears the there is a strong gradient to the peak. There isn't, My camera was a few degrees off level.
-
And now the Museum of Items joins the rebuild club. Wasn't planning on reskinning the Cinema, but it will happen at some point to fit better with the new style.
-
This half of the back scene is almost complete. Just the Museum of Items to reskin. It's been a big upgrade since I February. Need some nailed on good weather so I can set it up outside for a running session.
-
Another rainy day in lockdown. Another building upgrade for the Snicket Way.* I'm getting rather good at these now. Window frames are down to 1mm wide, which is fine enough for OO buildings. *actually took a couple of days to build, but in lockdown, who's counting.
-
One thing that adds to the time of designing with the plotter cutter is rearranging the cuts so they use the card efficiently. With black, white and cereal box card I don't worry too much, because I have plenty of it. But the coloured card is a rarer resource. I actually reduced the hight of these building by 1 cm to reduce waste. However careful I am, there is still off cuts. Heres the pile form this last build.