Archie
-
Posts
64 -
Joined
-
Last visited
-
Days Won
6
Recent Profile Visitors
736 profile views


Archie's Achievements
Advanced Member (3/7)
21
Reputation
-
The local model shop tends to have a good supply of used peco points in my area at a good discount. I have always found good deals on Clark Railworks for trains although you will probably find customs and duty ruins any value proposition.
-
I recorded 40.5 oC in the car yesterday. I'm sure its partly due to the sun. In the next hour we are expecting thunder and lightning, its crazy.
-
After a bit of a hiatus from the layout, I ended up making some acquisitions including an airfix class 31, 8 china clay wagons and a gorgeous blue Pullman set. First to run was the blue Pullman. This model is a full western 6 car set including the 2 parlour cars. One of these cars is a converted triang coach and the other a converted kitmaster coach. The locomotive itself runs very well but trying to run the whole train was unsuccessful with it derailing at multiple times around the loop. I think the solution in future will be to run a shortened set down to 4 cars. Here it is pictured still. Other than that I have also acquired an airfix class 31 which is not the smoothest of runners but its nothing a good service cant sort. Behind is a rake of 8 china clay wagons I have got my hands on. I have made new hoods but they are yet to be painted. Yet another project to add to my list. Finally I got out my class 37 as I wanted some hassle free running. I tried a black and white filter here and I think it is rather effective, the second shot pictured from the signal box makes it seem as if the train is longer thanks to the end being out of shot. Due to the operational issues I did not manage to get any footage but I plan on doing a video once I rectify the issues.

-
If I am honest this is a little out of my depth here. If you were to ask on rm web you'd probably get a wider range of replies, with that said it looks like the power is being passed through some diodes before being passed through a series of transistors that then change depending on the direction of travel and the signals of the decoder. This signal then somehow makes it to the lights. Is it possible that there is other components or traces on the other side of the board? from this view it looks like some of the traces terminate at nowhere. Maybe that would show a clearer picture of what is happening.
-
Having a deeper dig this diagram from this RM web thread seems to show how be in a simple form the lights would connect to the decoder, unfortunately I think there is a little more to it because, as you mentioned, there is only two connections between the cars of the DMU. It would be useful to know, do the lights activate as the result of one function on the decoder (ie - does one function activate the lights for both the front and rear and change depending on the direction of the train? If they do, if I were to hazard a guess to how it works I would say that the diagram I drew probably still applies and all the processing that takes these three outputs is done on the main PCB in the drive car and then the output is sent over the two connections to the dummy car. I hope what I have said has kind of made sense here. https://www.rmweb.co.uk/topic/132094-wiring-white-red-smd-leds/
-
Having a look online I can't seem to find an image of the dummy car with the body off. But in its simplest form, the wiring for the lights would look like this. if the lights are controlled buy the decoder my best guess would be that the connection to the locomotive would end up going to the pcb and then to the decoder. If they are dumb then the connection to the locomotive would most likley just go to the pickups. Not having one nor anything similar I couldn't tell you exactly how it works but this would be my best guess.
-
The p9600 is discontinued. There is a power supply that is sold to be paired with the HM6000 but it is less powerful and costs more. With that said the HM6000 seems to already be on sale in some retailers so that cant be a good sign for its success. If you want to see the features I suggest you watch a video on it as it can probably explain all this in a lot more detail.
-
There is a stop all button which cuts all power Immediately and allows you to change the controls and restart if there is a problem. The range is really good. I have managed to get about 10m away before it cut out. all it needs is (relative) line of sight (eg no walls, but plants it can deal with) and if it disconnects I'm pretty sure the train stops. One thing to take into account is that it uses pwm control of the trains instead of analogue control and so the trains have a slight hum when running at low speeds. Another thing to take into account is that it has very sensitive short circuit detection so it sometimes stops the whole system when traversing a point which can become rather frustrating although it can be fixed with some paint around the frog of the point. Other than that it is quite a good system for the low price (£25 on amazon + £15-25 for the transformer). I have managed to get a discontinued P9600 transformer that is cheaper and has a higher power output for £15 at the model shop. I think there is still a couple shops online that are selling them off as old stock so if you can find one, they are your best bet.
-
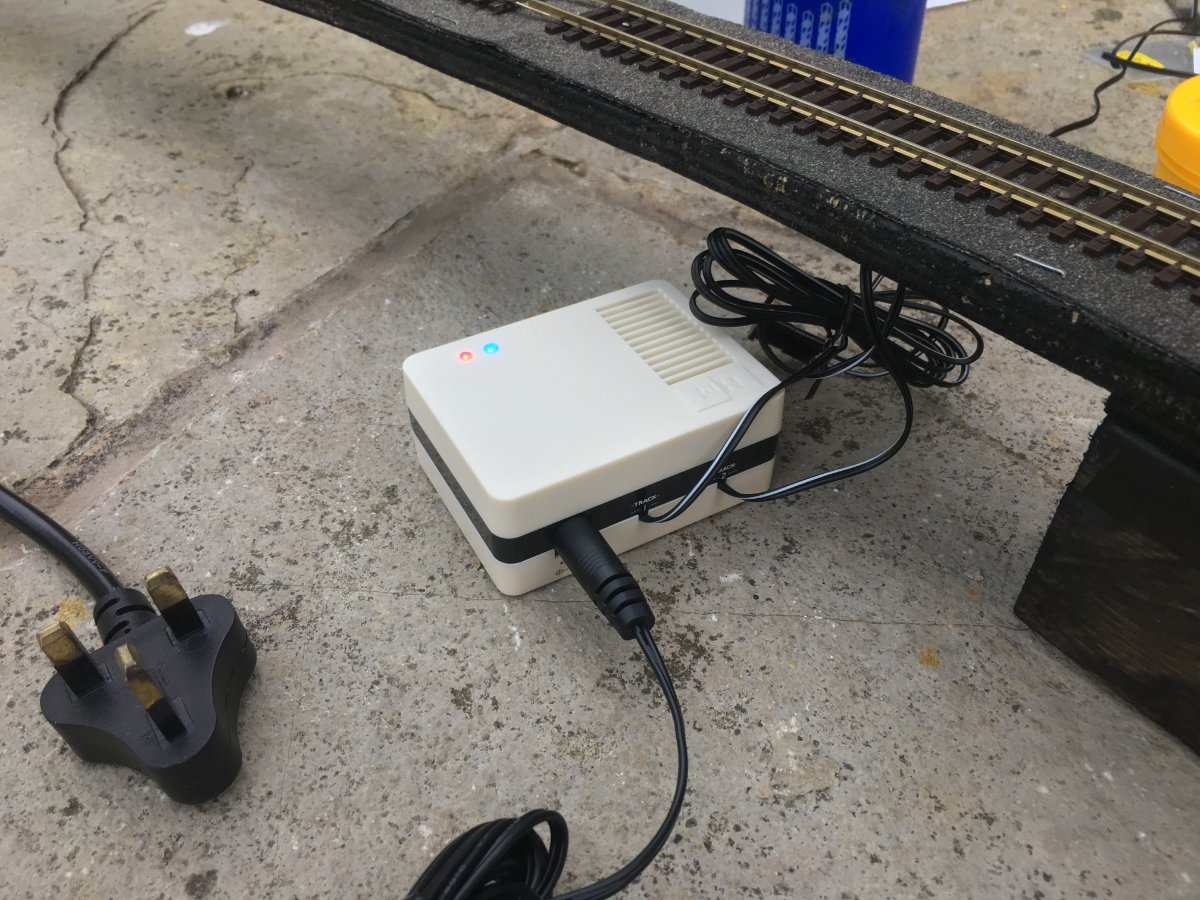
Since last posting I have made considerable progress and have fully completed the fiddle yard: Each road can hold a 5-6 coach long train and the return loop can hold a 12 coach train when not in use. Each track can be isolated individually to allow 5 trains to be operational at any one time. Because each half is separated by a return loop two trains can run at once if I cut the line in half. This also means that I can run trains without having to clean the whole line if I dont want to use half. Something else that's new is the Hornby HM6000 controller. My old H&M controller has started to falter and so I thought Id try something a little different this time. A while ago I created a similar Bluetooth controller with an Arduino but It was quite clunky and so I reverted back to a regular controller. The benefit of the Bluetooth controller outside is that I can move around whilst still being in control and this Hornby one does a pretty good job at it. I can control the trains all the way from inside the house with the controller at the other end of the garden. The inertia control is also a very cool feature that is not gimmicky at all. The other features like the sound are not very good although the horn I find myself sometimes using. We will have to see how it holds up in the long term but from what I can see its rather good for the price (if you exclude the fact that you have to buy the power supply separately). Unfortunately, I feel like it is something we have come to expect with Hornby.
-
Honestly I think you are better off saving the money and getting regular ply, then seal it with a fence paint and then potentially covering with felt. One of the advantages of felt is that it is able to cover any imperfections or rough edges of the wood; and as Chris said, it looks a little like ballast without having to put in much effort. With this said no method is the be all and end all and you should feel welcome to try any new method you want.
-
I'm sure the shininess could be a factor, I find the pigeons poo on whatever is underneath the tree branches. Ive found it on the covers that I use to cover the particularly badly effected spots, and also around the grass and flowerbeds so it seems that they dont mind to much.
-
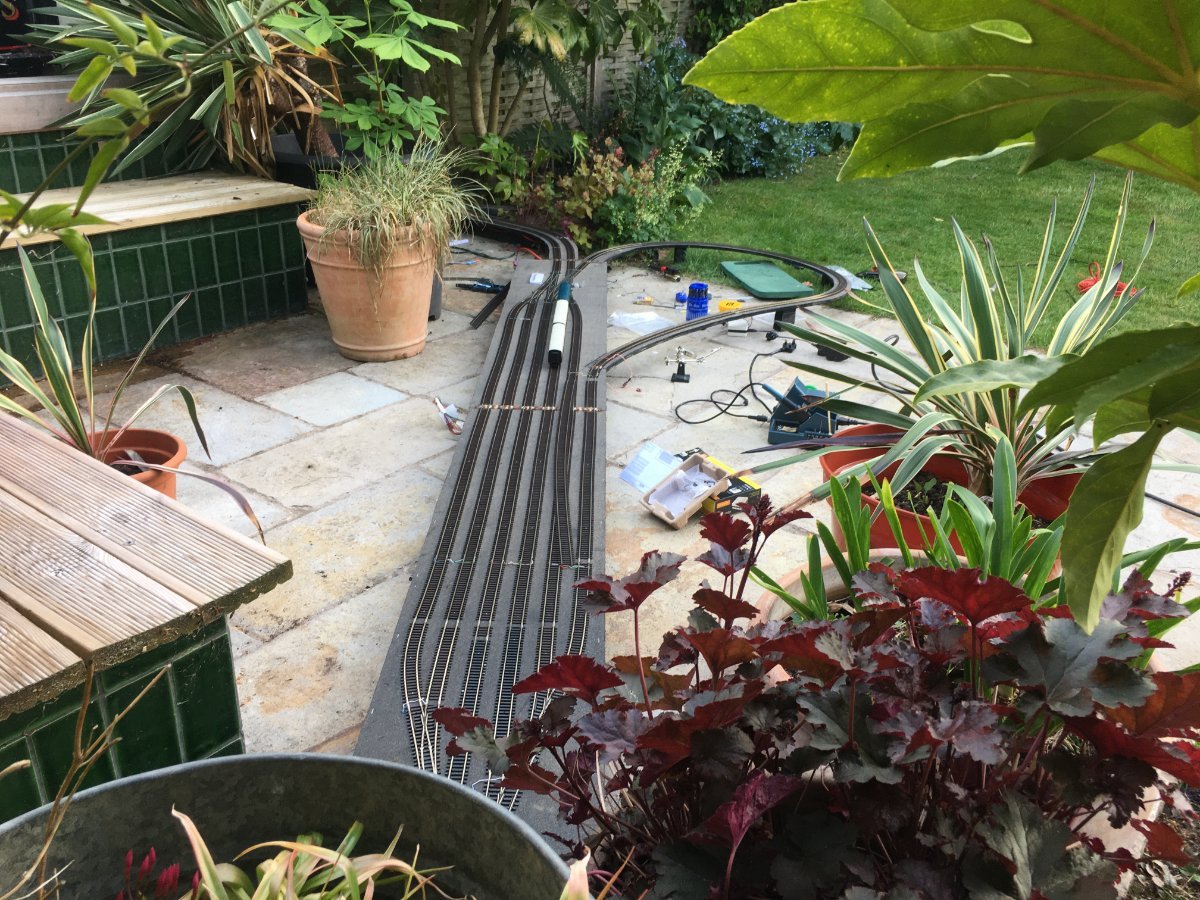
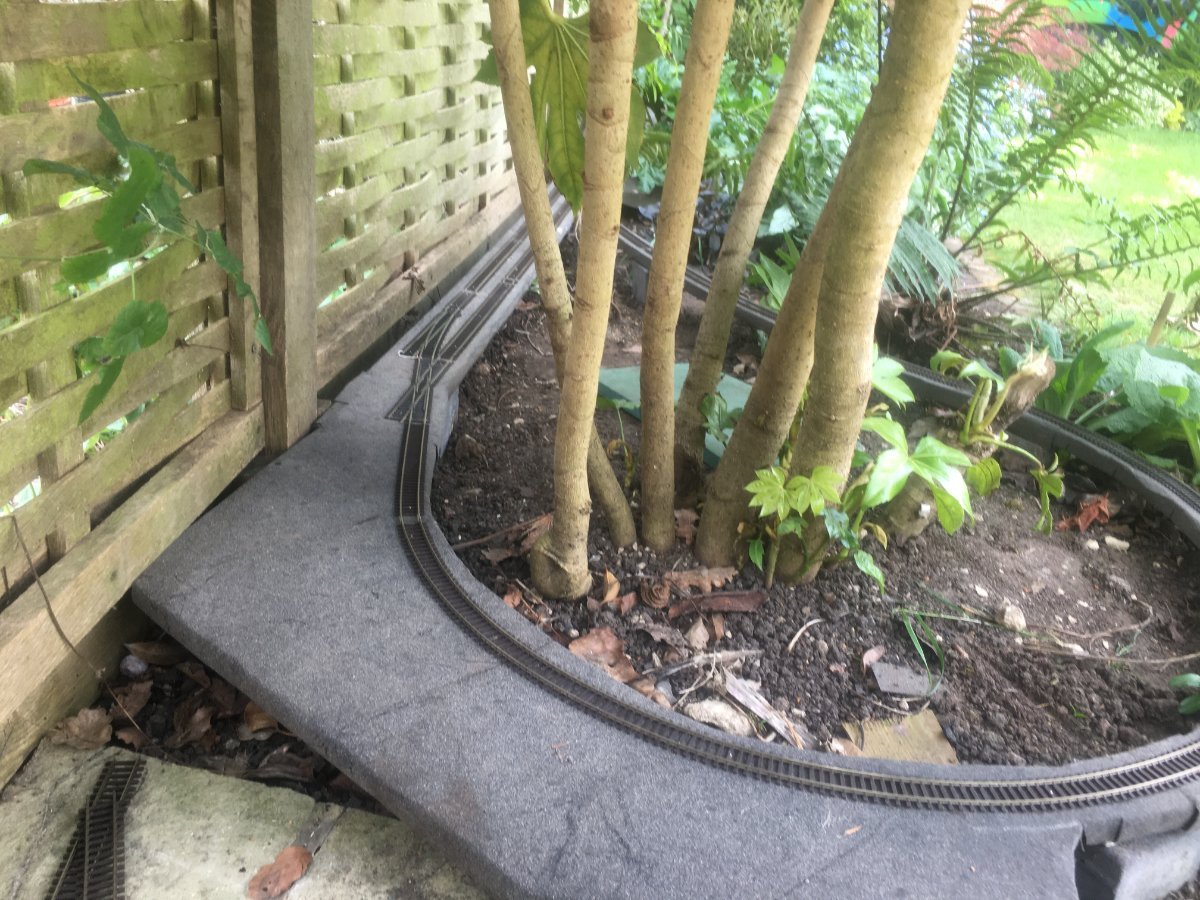
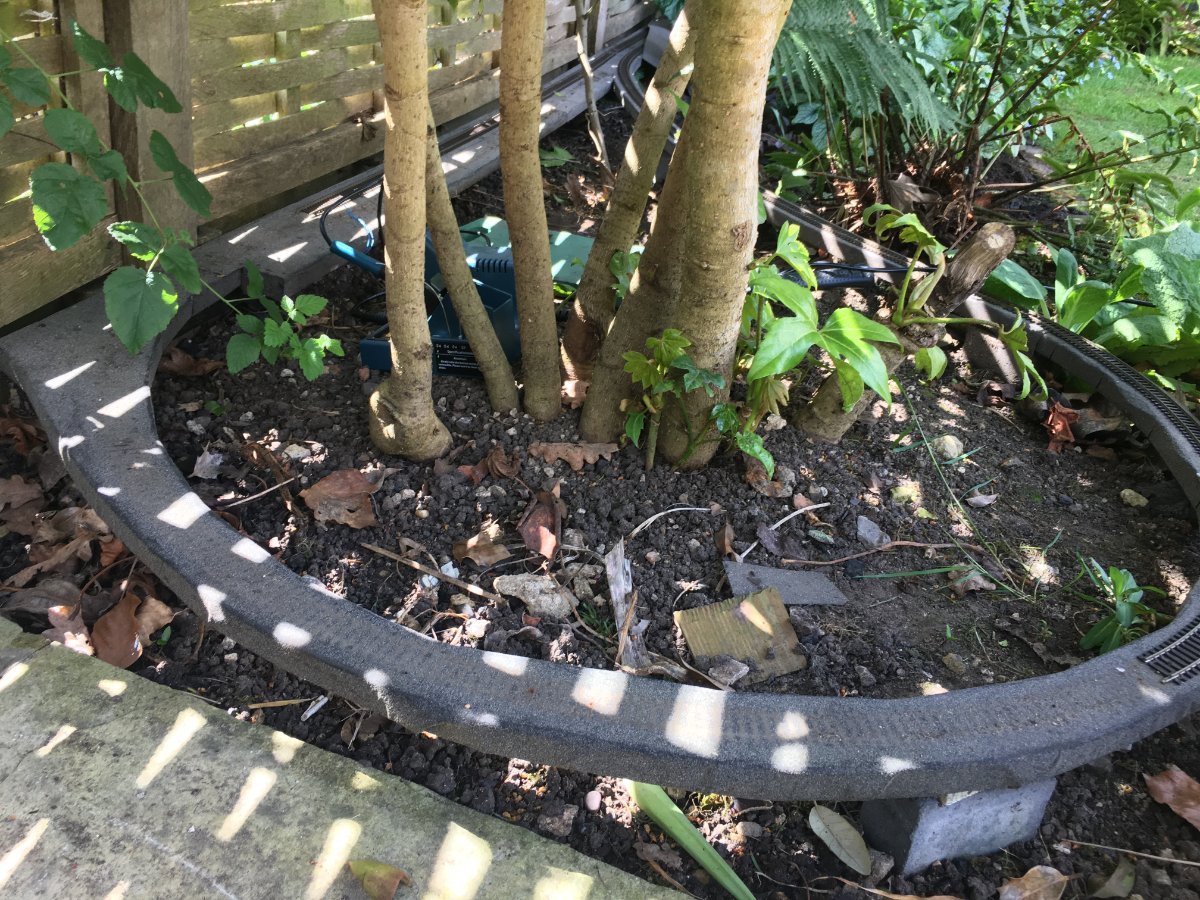
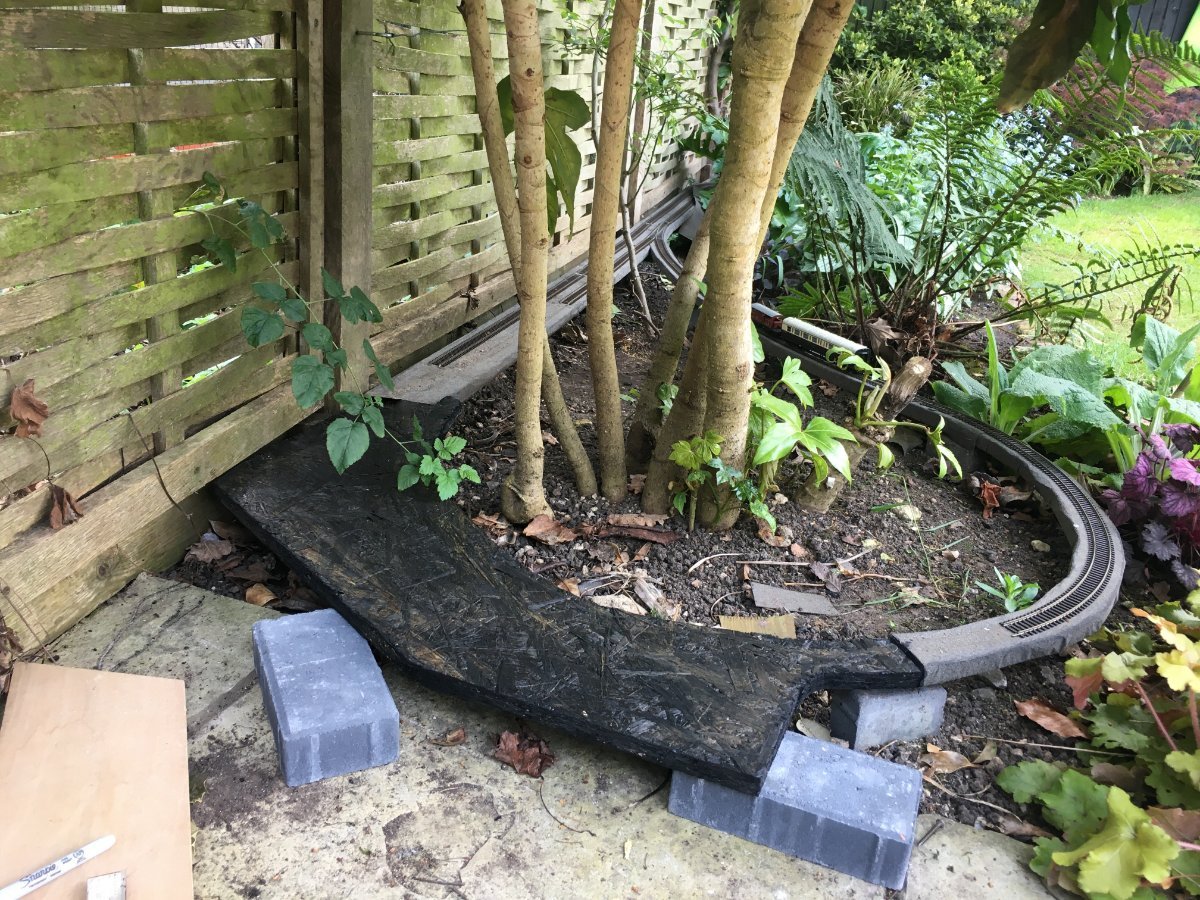
over the last couple of days I have made even more progress on the railway: I have felted the new board in the corner and relaid the return loop to allow trains to run again. Only after laying the track did I realise that I had bought an electrofrog point instead of an insulating point! It took me a while to figure out what was shorting the system, I will need to pull that out and replace it. after that I have started work on the storage yard boards. These will be removable with hinges with removable pins connecting the sections. I need to figure out a way to secure the tracks at the end of the baseboards at the joining sections, I have seen it done by soldering the track to pcb boards so I will give that a try.
-
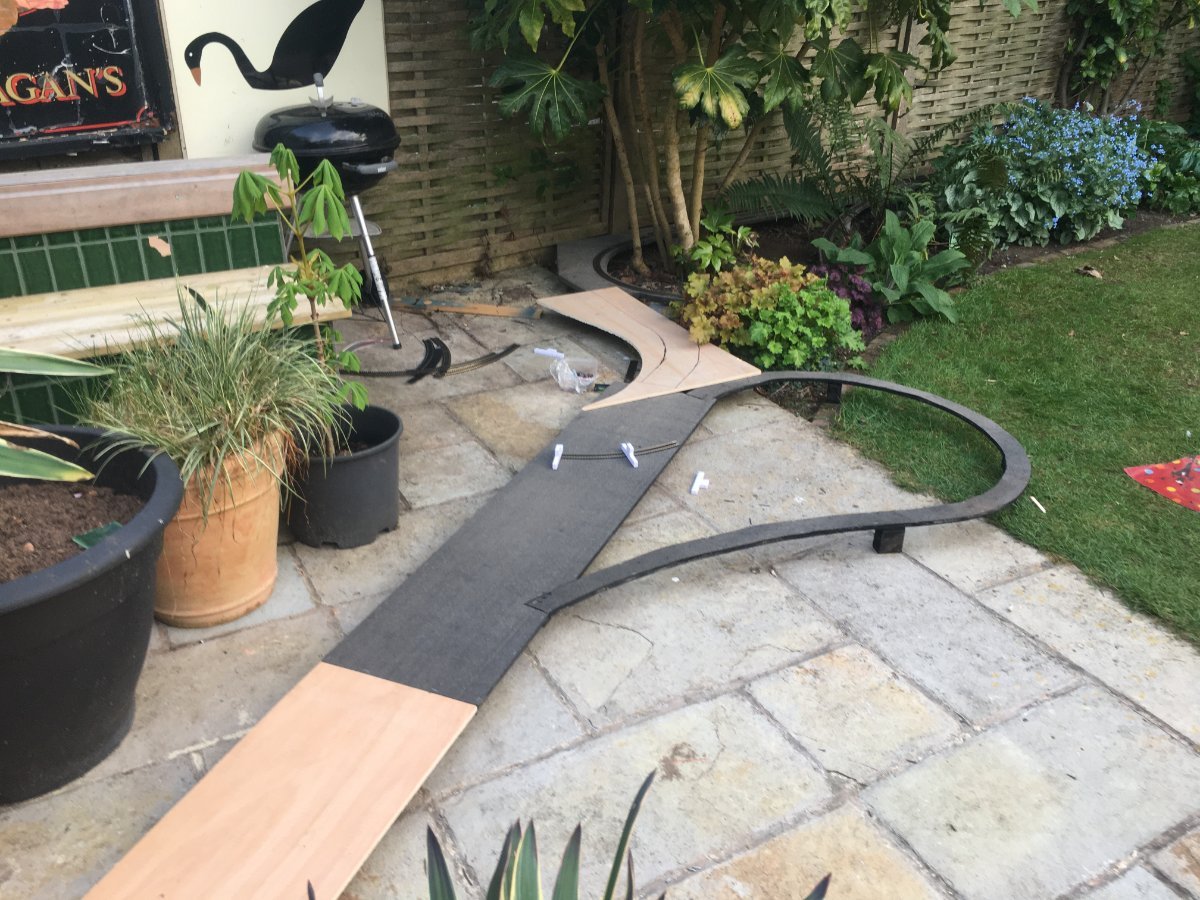
Whilst many have been enjoying running trains in the heat we have been getting, I have lifted the track at the top and started work on the extension to the other flowerbed. First, the track at the top was lifted and the old board cut in half... ... Then the new board went in with a spur to go onto the new boards. The loop track is now second radius at this point and so probably not suitable for some stock but that should not be a problem as the main running lines will be third radius and above. Here you can also see the new point, which has been installed connecting what once was the siding and the loop line. The ply sections are to become a five lane storage yard with return loop for the other half of the railway. This means that both halves of the railway can run separately allowing two trains to run at once.
-
brass pins are ideal. steel pins rot away however much you protect them and screws are probably too fiddly, although you could give them a go and that area of garden looks great for a railway, its definitely not to small.
-
Its nice and sunny today again so I may get trains running 2 days in a row, with that said the weights for my 3D printed wagons have arrived so it may be worth trying to finish some of them off. To be fair the Hymek is a loco that I also dont know much about, I have only been looking for one as I think they look quite elegant, especially in green.