shaung75
-
Posts
111 -
Joined
-
Last visited
-
Days Won
7
Content Type
Profiles
Forums
Gallery
Everything posted by shaung75
-
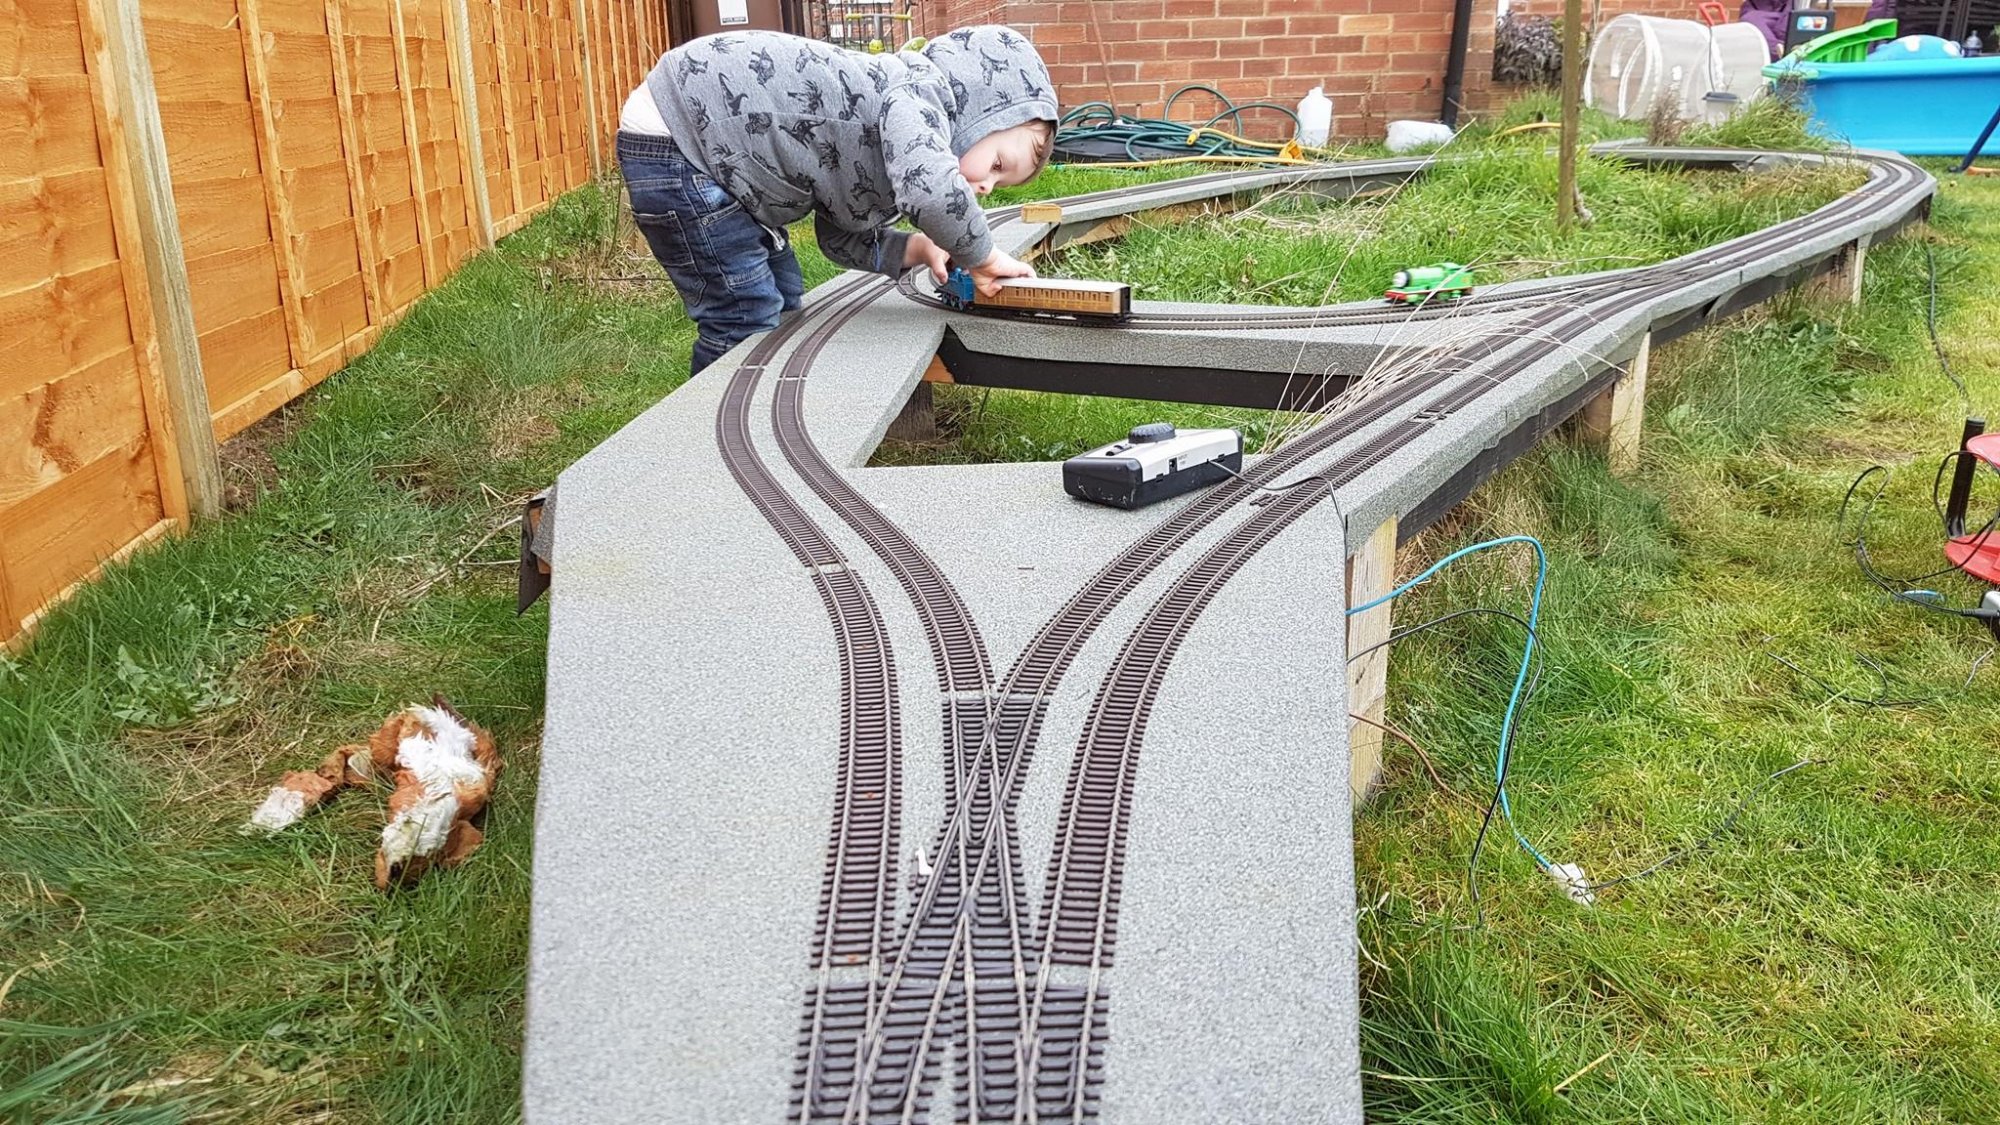
Managed to lay the track this evening and to save getting the controller out I gave the Clockwork Thomas a run for his money

-
Hi Tony, hope your son's feeling better soon It's the crossover that's the issue rather than the wiring and polarities - certain locos cause a short when they go over the crossing, (some every time, some intermittently and some not at all) so it's really frustrating. I will eventually be going to DCC, but at the moment the layout isn't big enough really to run more than one train at a time at the minute so can't warrant the upgrade just yet. Once the loop is complete down to the shed (see here for phase 2) I'll be making the change. For now though I managed to bag an ebay bargain with an old Hornby clockwork Thomas so I don't have to set up power everytime the boy wants to have a play
-
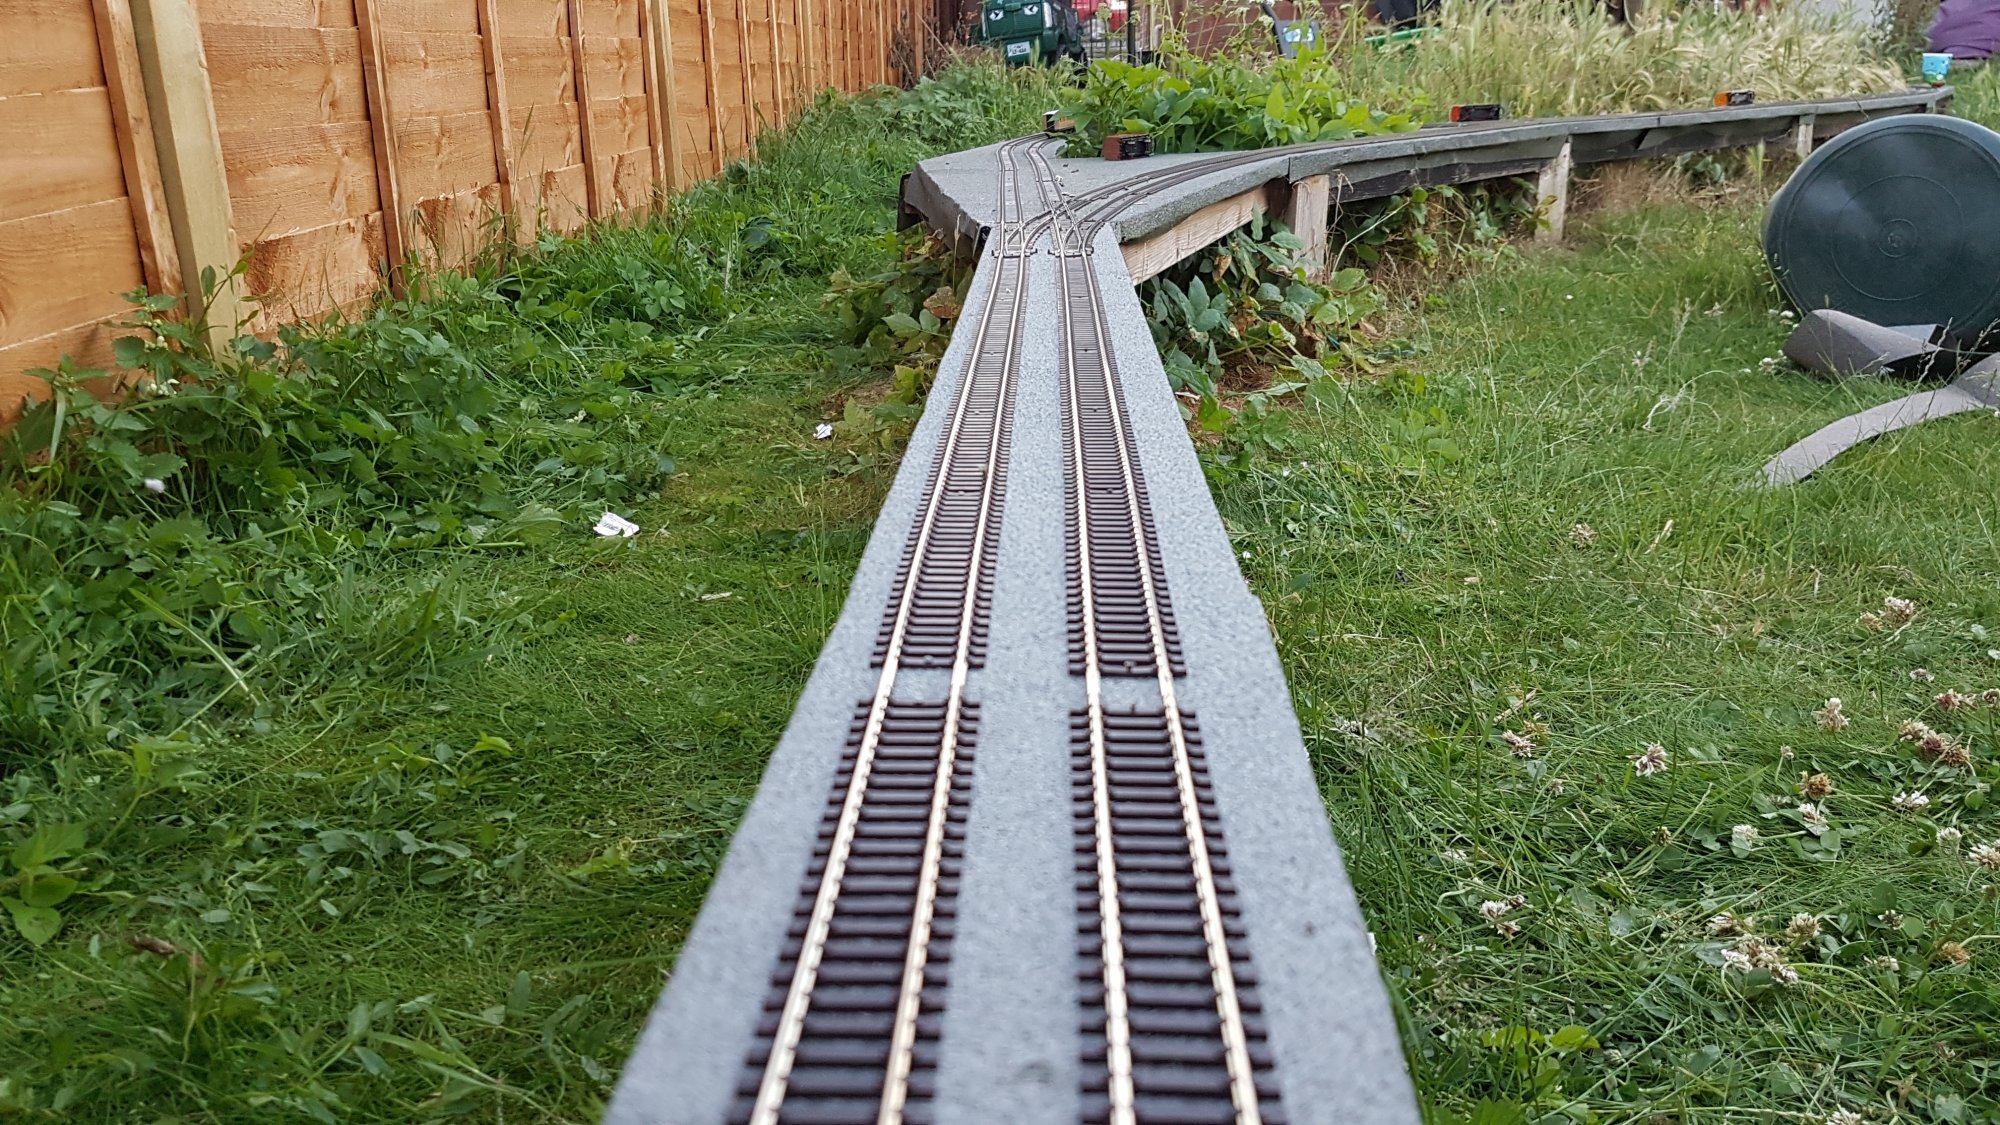
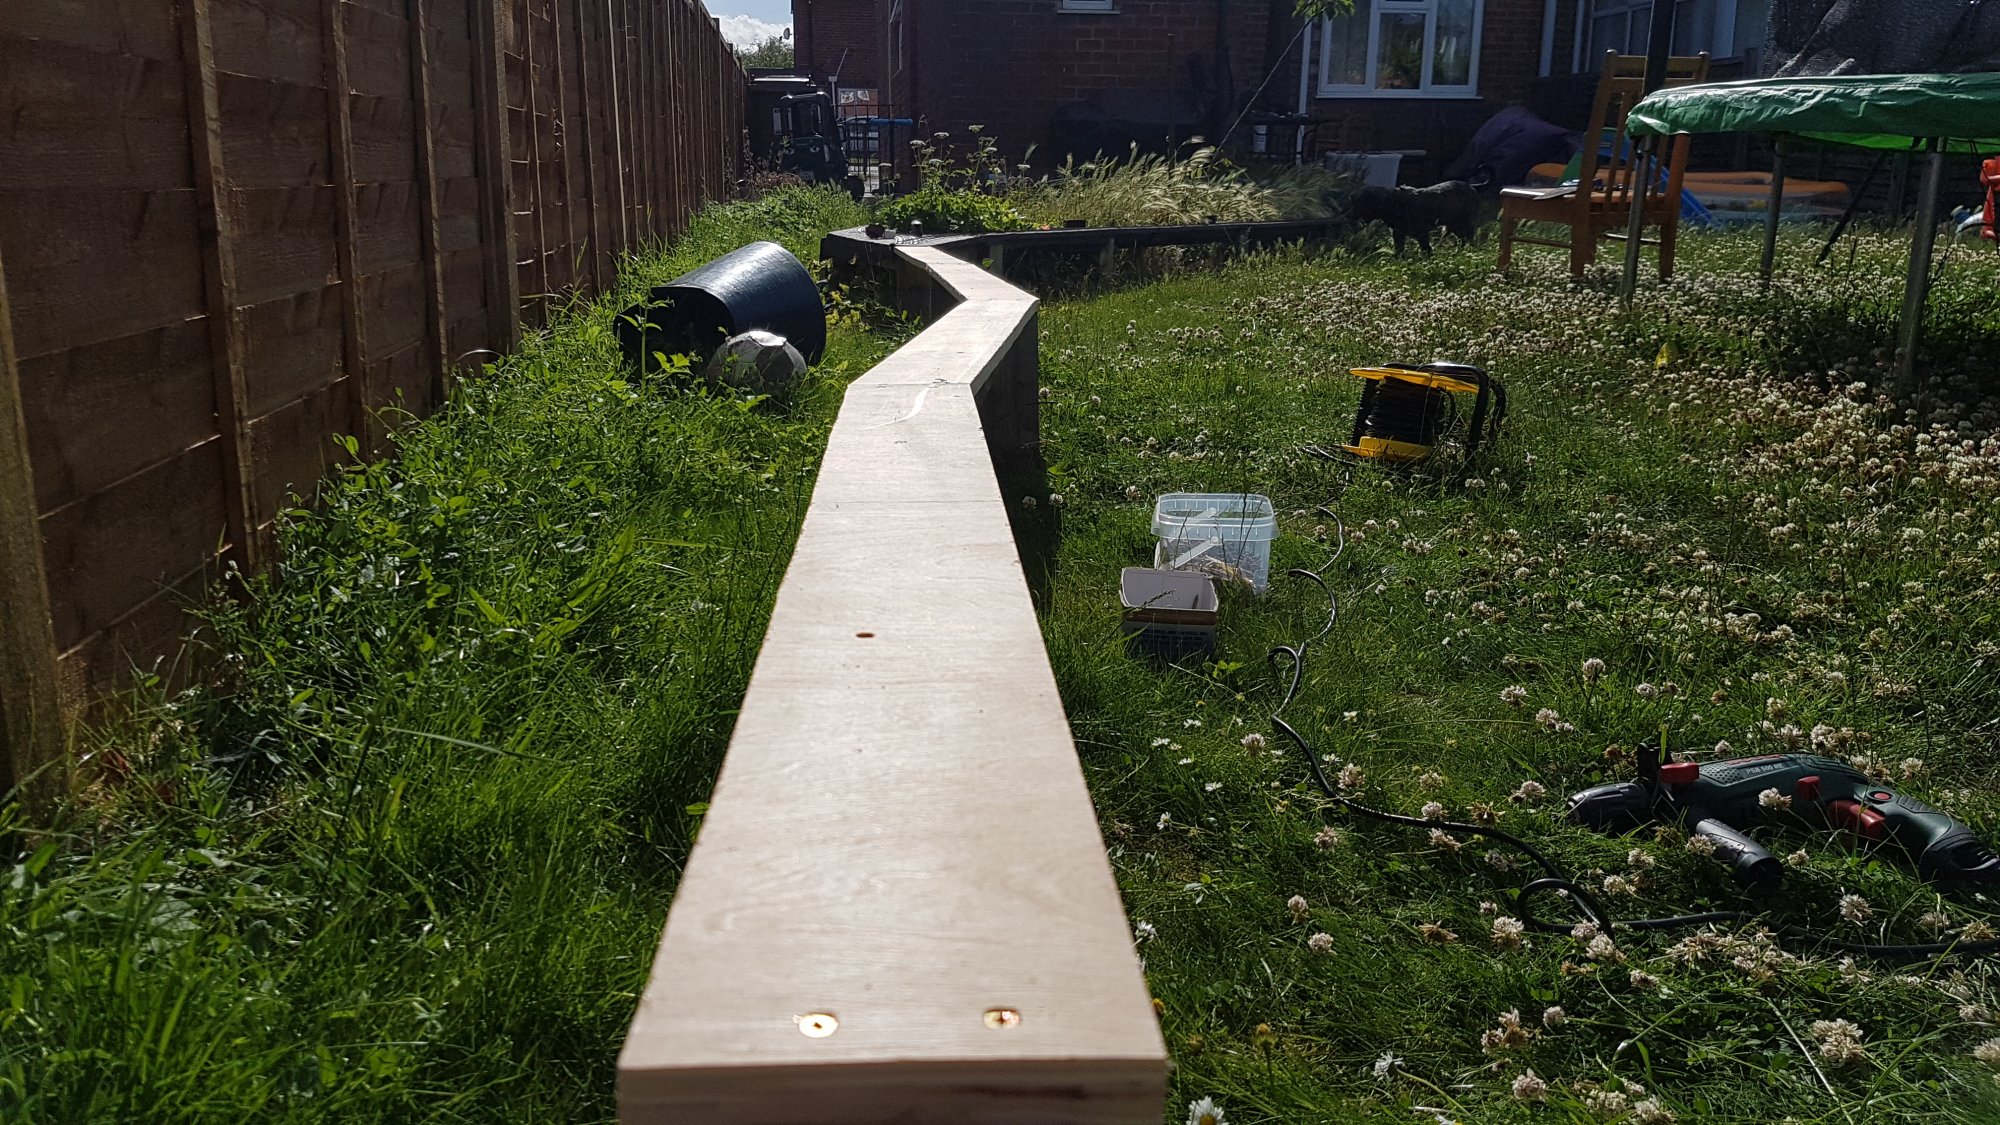
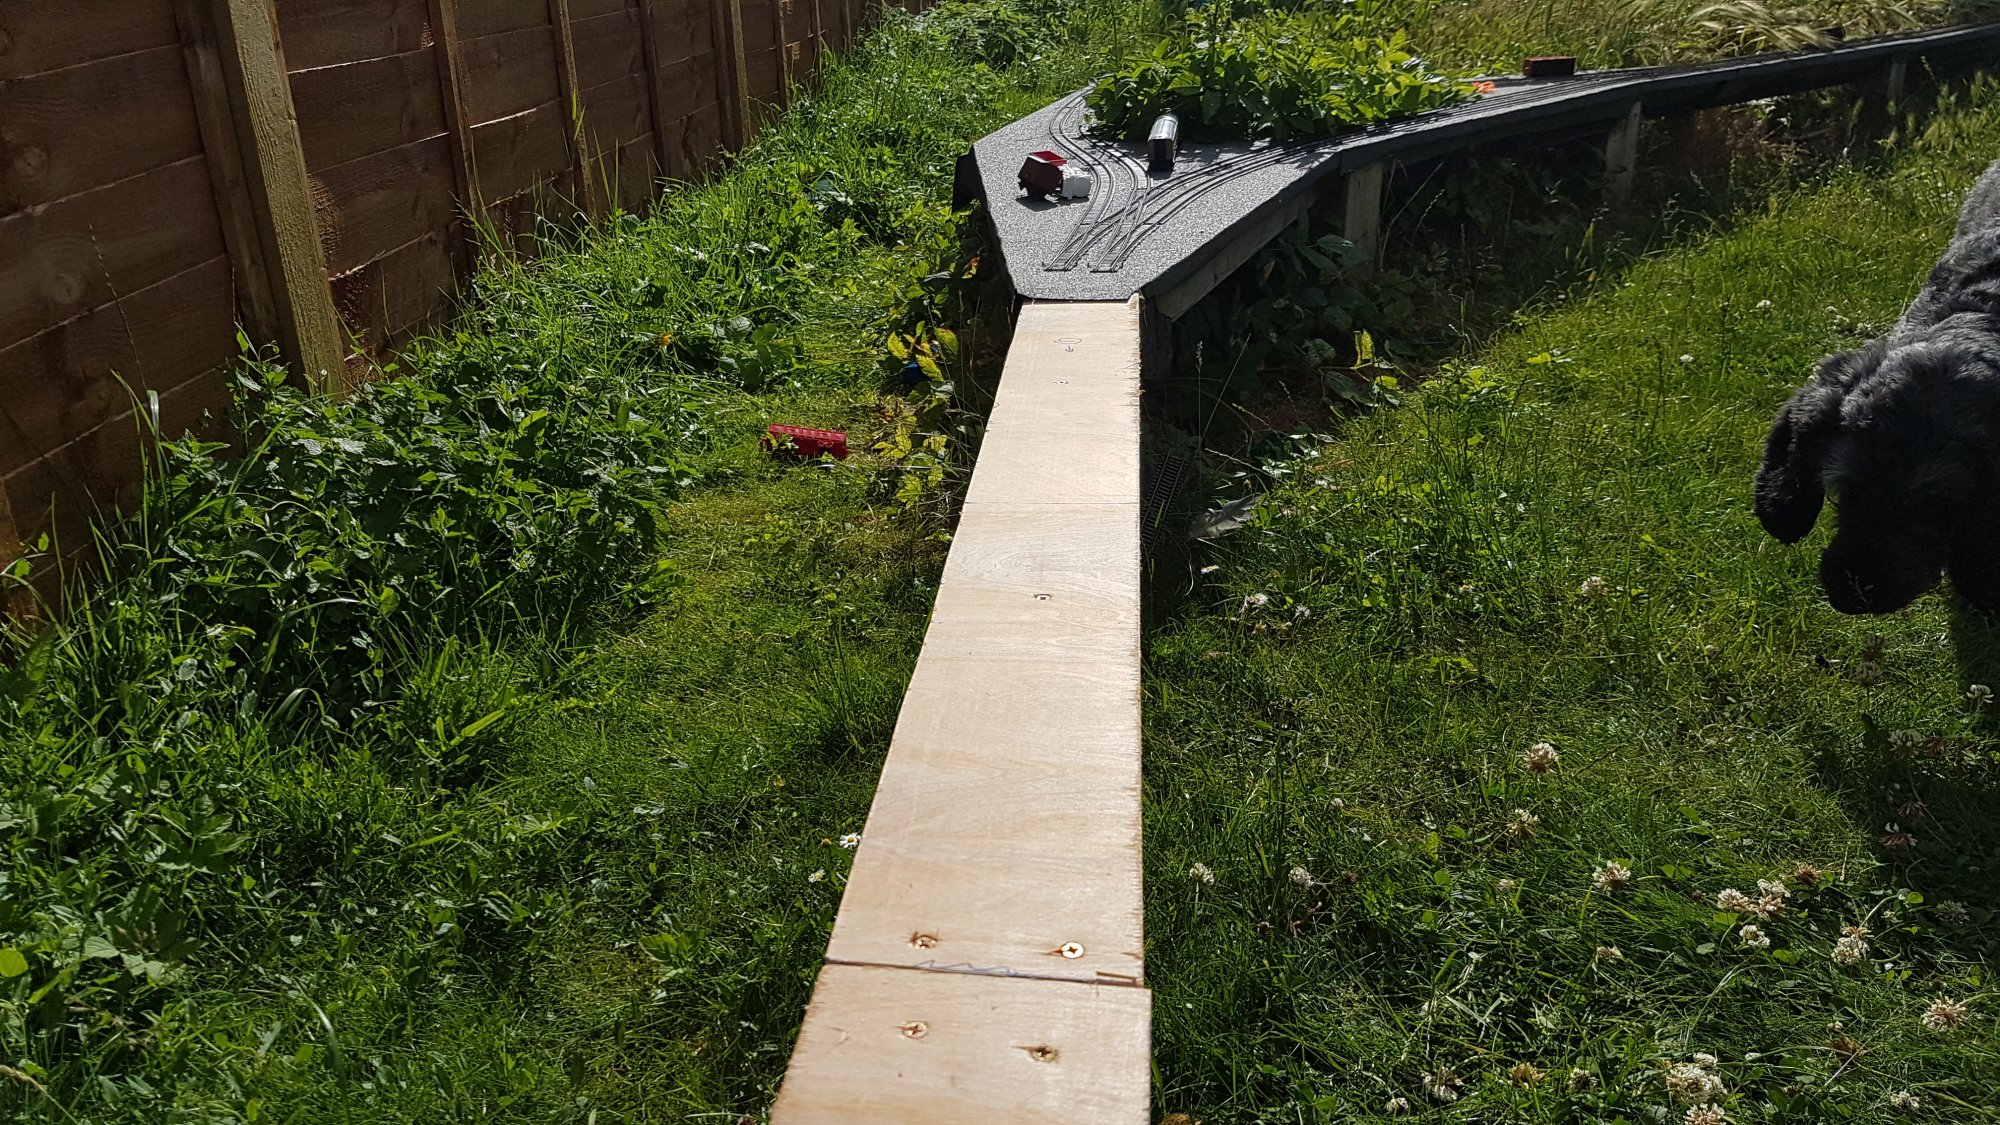
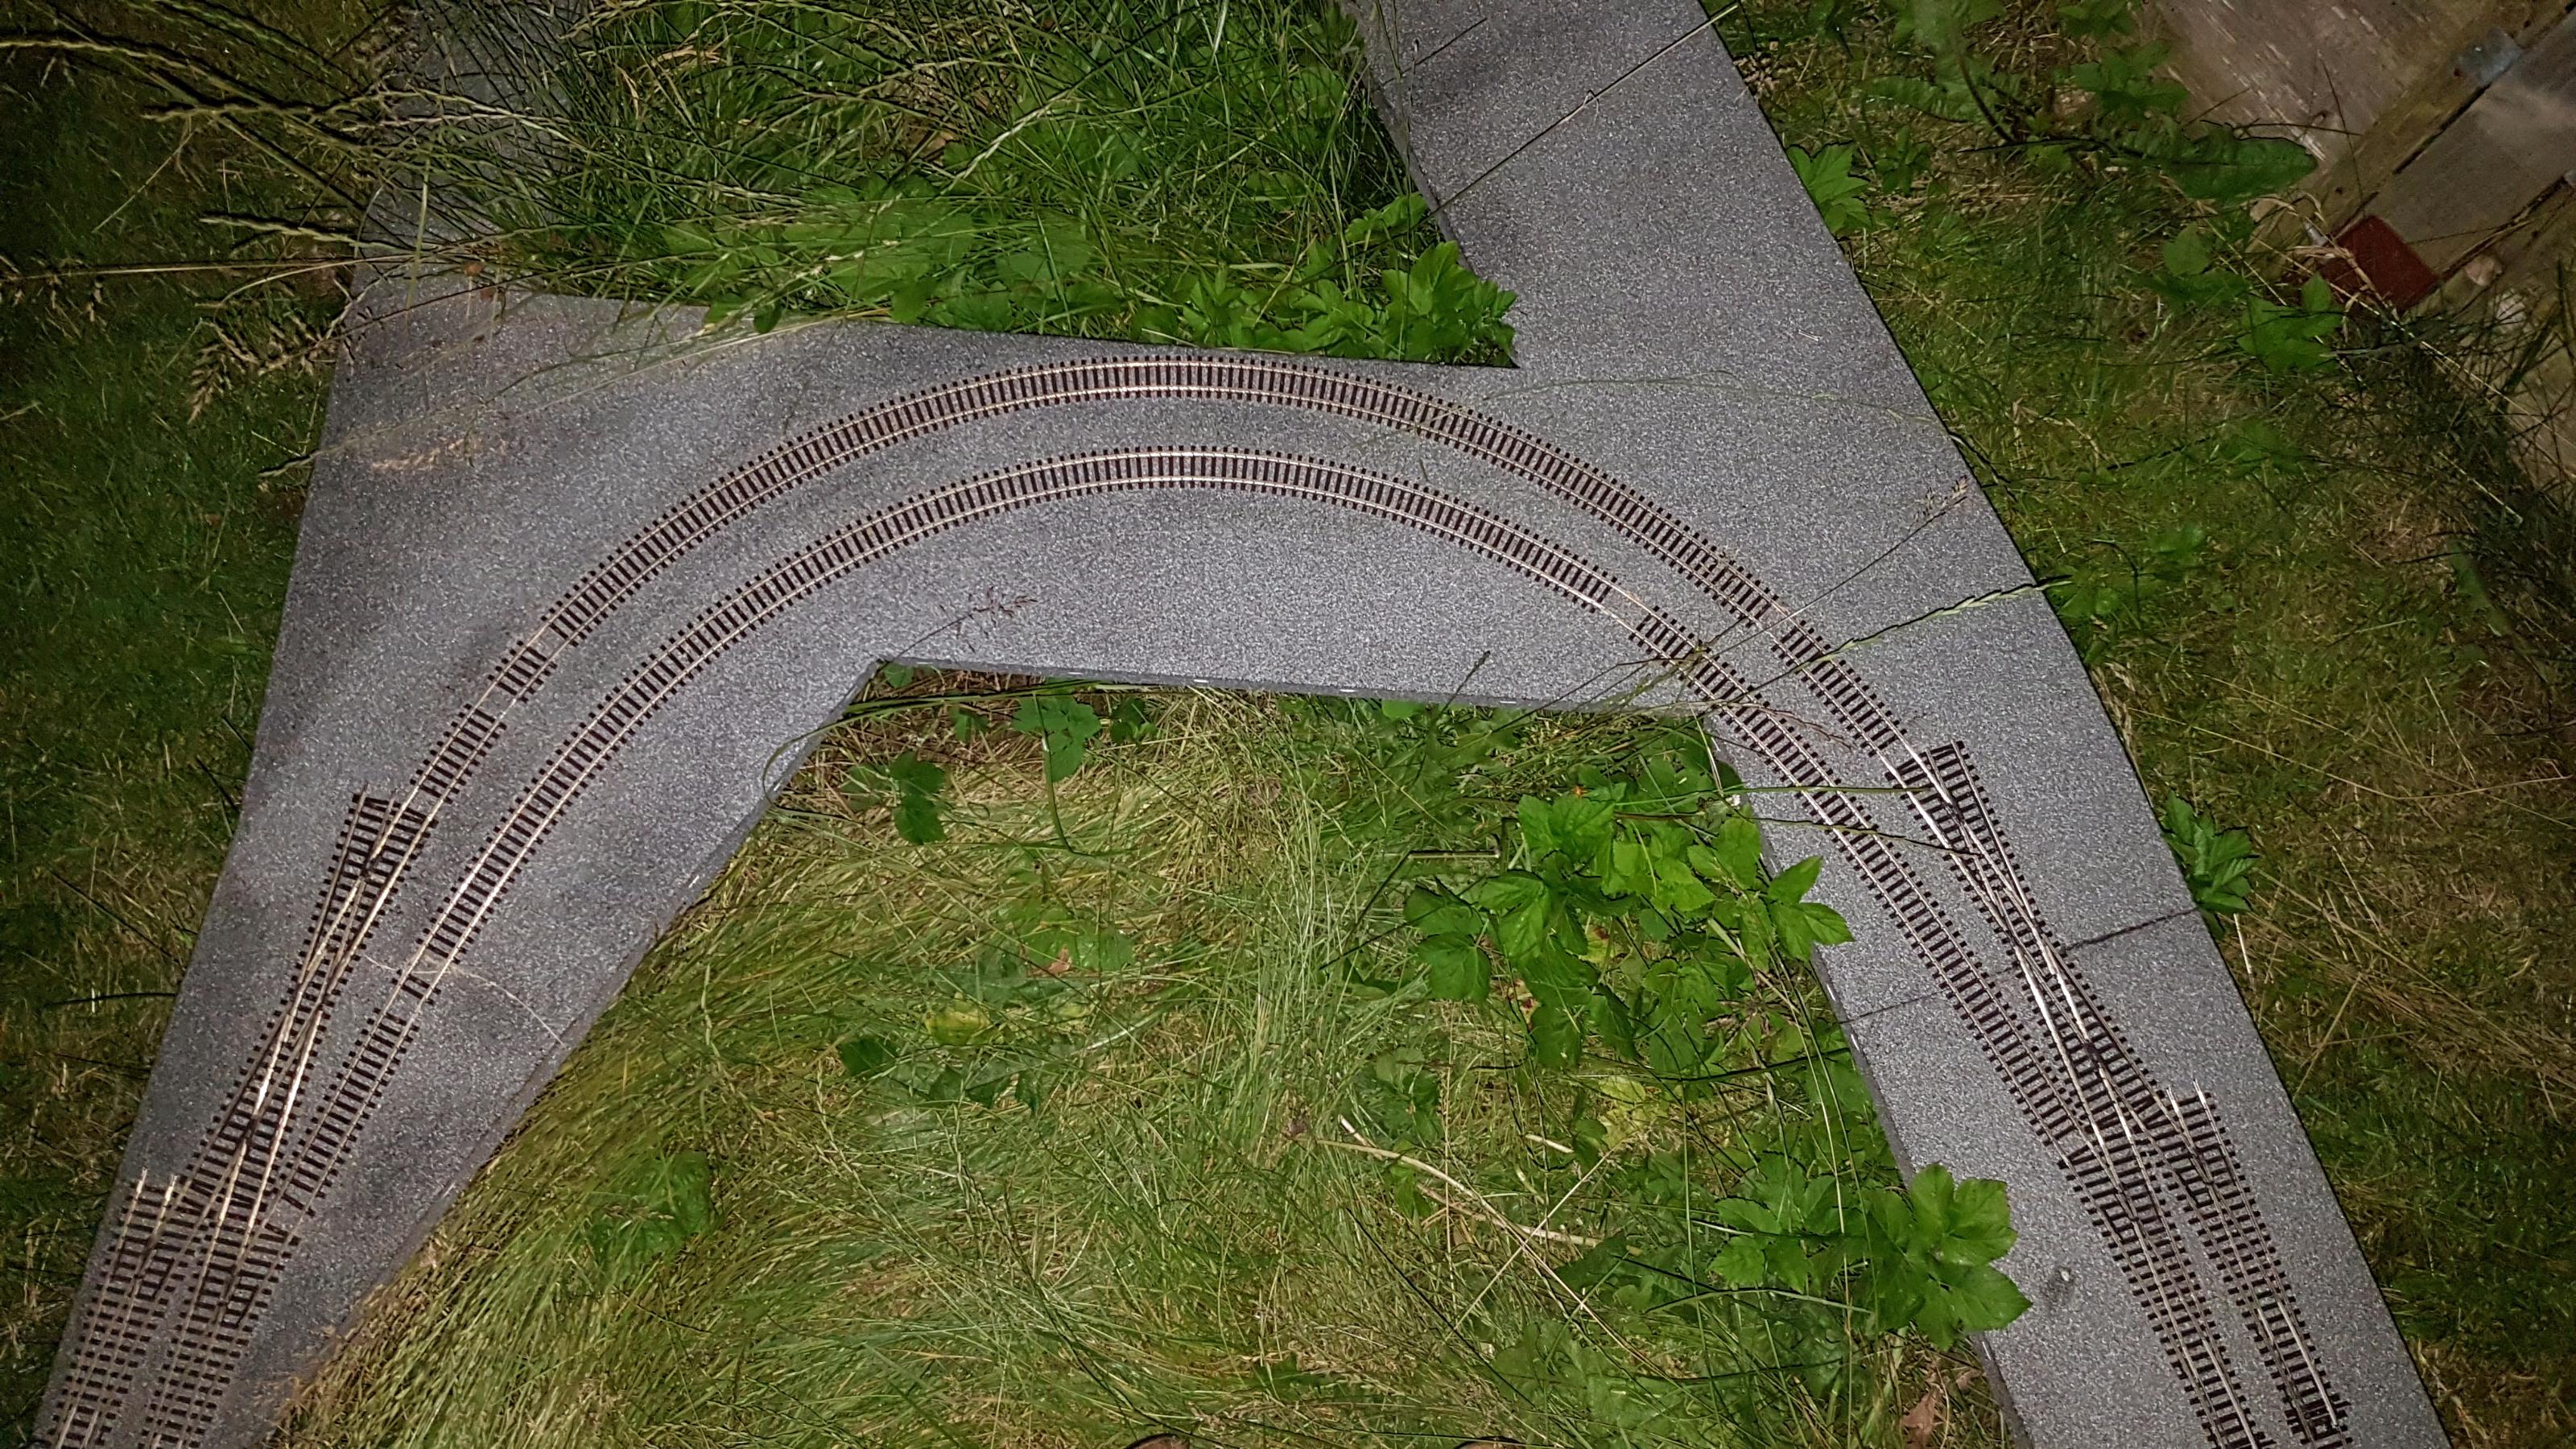
Today has been a good day on the Poacher Line - I've given up for the time being on trying to find out what's causing the short circuits on the crossing and have decided to focus on the building side of things instead. The planning officer (aka, "the wife") has allowed me to use one of my precious day's off to tinker with the layout, so this afternoon has been spent making use of the posts that have been in the ground for the last year and have finally made a start extending the layout down to the shed. Don't get me wrong, it's only and additional 7 meters of baseboard down, bitumen painted and felted, but it has given me the enthusiasm again to crack on with it. Now that the new boards are fitted, it became obvious that the old junction needed pulling up and relaying This is as far as I got before it began to get dark Hopefully I'll be allowed some more time over the weekend to get the junction finished
-
That's interesting. Thanks Rossi, I'll go back and have another read through. Although mine is only a Hornby Railroad (so the dangly bit doesn't dangle as much), I have been focusing on what the wheels are fouling to cause the problem, not the other bits surrounding the wheels... Worth looking into
-
Only the Dean Single is tri-ang, the main culprit is a modern hornby class 47 - I couldn't see any evidence of either riding up onto the checkrail. Odd, shall keep investigating....
-
Thanks for the reply chaps, I'll invest in a gauge and see what the results are. To be honest I'm not 100% convinced it would be that as the Dean Single has the old Tri-ang style wheels on the front bogey where the wheels can freely move apart. Still, I'm not ruling anything out so worth a shot! Managed to get a decent amount of running with the boy today by using the inner loop (avoiding the crossover) and snipping the bits that I'd soldered in to join the rails (eliminating shorts). All in all a good afternoon - faith restored in the hobby!
-
Hello all, this is a desperate callout for help as I'm about ready to give up on this bloody hobby of ours. Can anyone here see anything obviously wrong with this crossover (specifically the rout from top right to bottom left). My class 47 and tri-ang Dean Single constantly catch the frog so going over it at anything other than a crawl results in a derailment, and Ben's 0-6-0 Thomas tends to cause a short (but doesn't derail). At first I thought it could have been down to the curve leading into the crossing as it appeared to have a minor kink, but I replace this section with a Hornby Radius 4 set track piece and the issue still remains. Getting on my hands and knees to get a good look at it while manually pushing the loco over the crossing towards me, it's almost as if it's front-right wheel wants to pull to the right and join the other track but just catches the frog instead. Any help appreciated as I was out with Ben for a good 5 hours yesterday on the layout and wasn't once able to just sit back and enjoy the trains with him. Feeling a bit deflated to be honest...
-

restoring a Dapol BR black 0-6-0 saddle tank
shaung75 replied to Nuvolari's topic in Members Workbench
Good work! -
Popped into my local model shop today with the intention of just buying some loco oil (which turned out to be a waste of time, but that's another thread...) and ended up walking away with an old Tri-ang Dean Single and 4472 from their "bargain bin". Suggest you don't have the sound on too loud for this one, it could do with a service
-
This weekend has seen a new addition to the garden railway - a £40 new Class 47 from ebay. I'm amazed at the difference with these modern locos, ran as smooth as a nut straight from the box with no track cleaning required! All my other locos need the track as shiny as anything One day I'll remember which side of the tracks the trains run in the uk...
-
Hi Steve The motor shield is used to boost the DCC logic signal to the correct voltage - the arduino is powered through USB at only 5v, whereas the shield can be run at whatever you like. Those blue terminals on the left of the motor shield are DC in, Output A and Output B - the signal to the main running track goes through output A and the programming track goes through output B. Have a watch of the following, hope this helps: Shaun
-
Yep, I still have my 'Made in Great Britain' Thomas too from when I was 4. He may be battered, lost his face (and a buffer) and have some weird rear suspension issue going on, but he's my Thomas and the boy isn't allowed near him
-
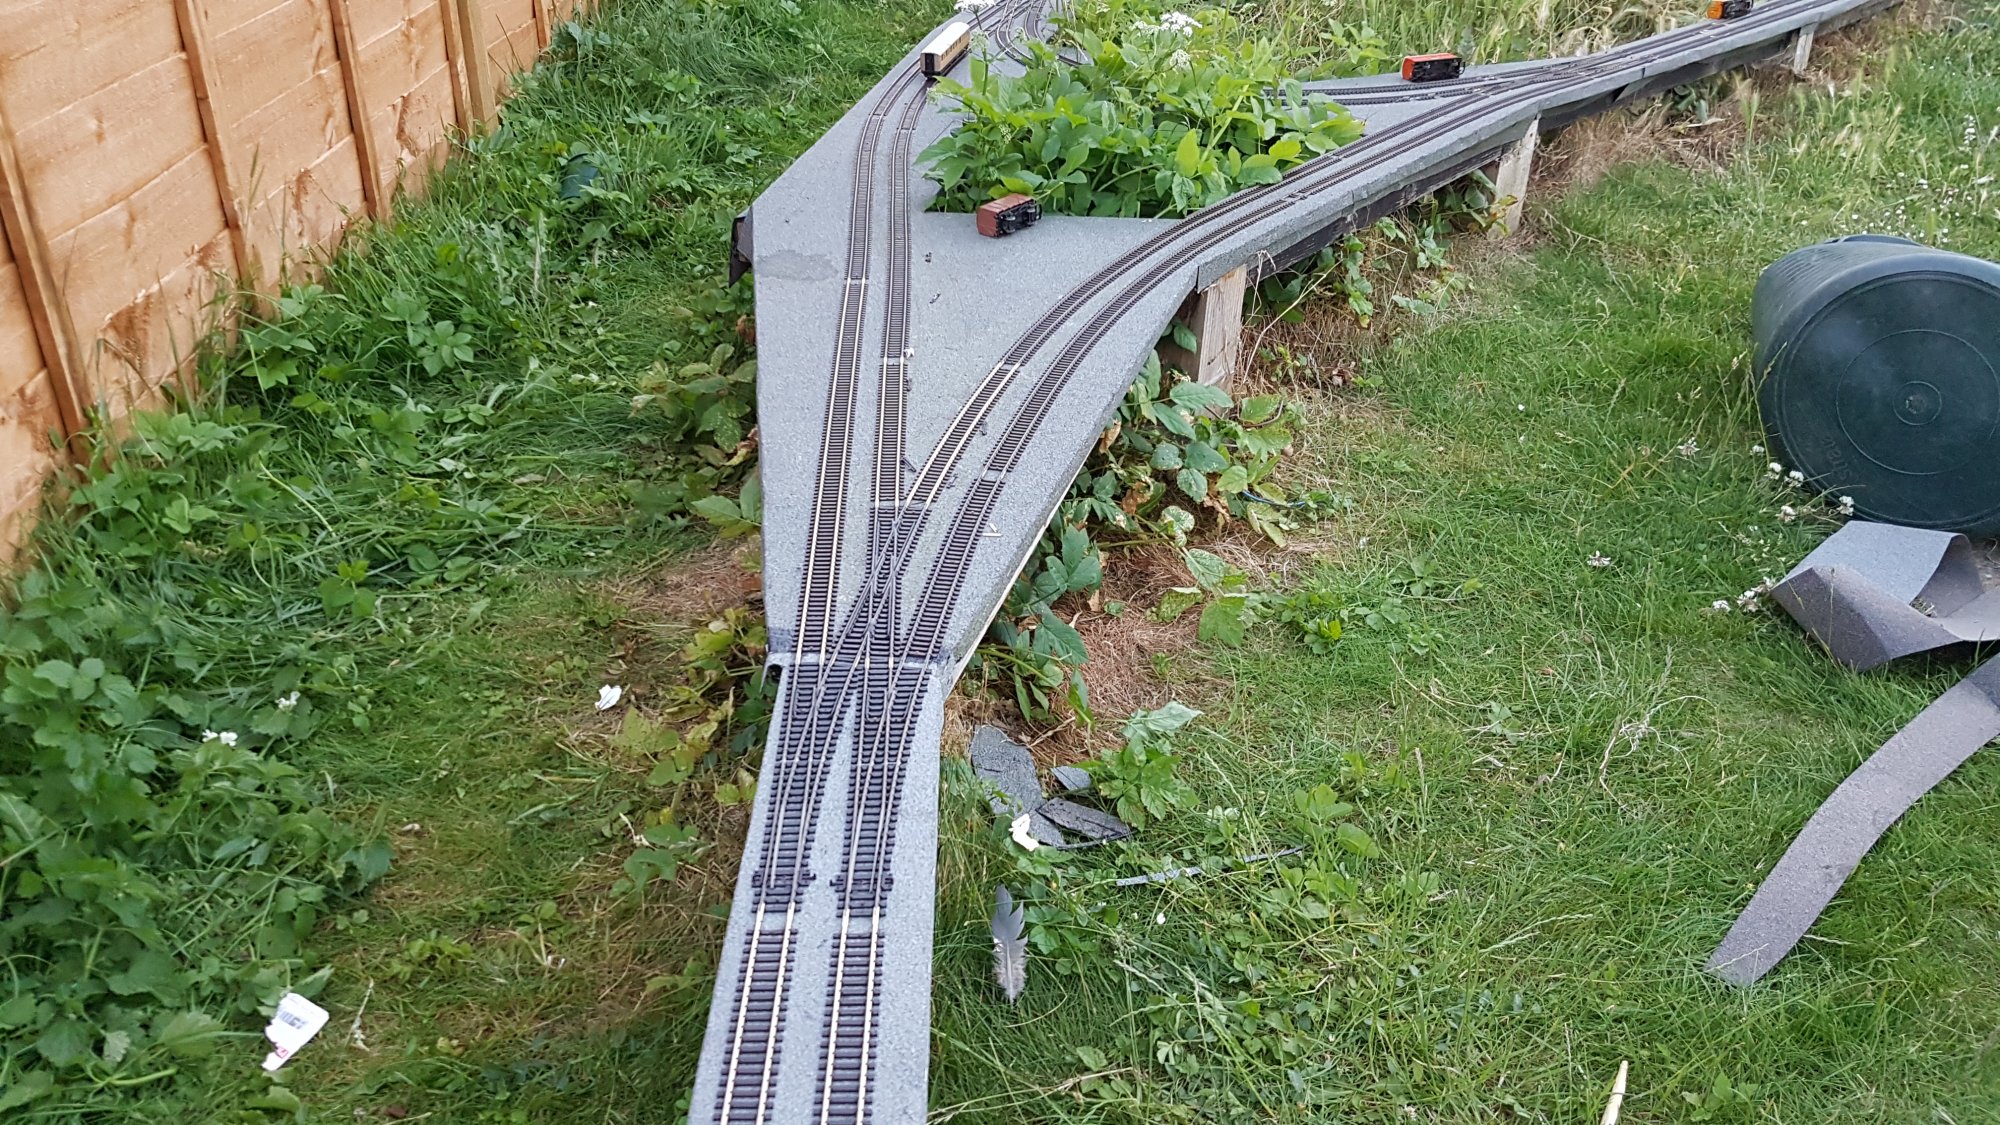
Cat? Not a chance! I'm very much on the dog side of the debate! That right there is the remnants of a cuddly toy fox - our dog can't have any toys for more than 10 minutes without being "killed", ripped apart and then dragged outside. Even the 'indestructible' toys only last about 30 minutes. What type of dog do we have that can do that? A pitbull? A staffy? No, a Poodle Basset cross!! Thanks, I'm still not sure if that's how it will remain though, I wanted it to be a bit more of a gentle split than it has ended up being. Probably should have gone with RH points instead. The flextrack haven't been bonded yet so I'll have a play, but that space on the left of the track as it is now does give possibility of a line-side building to hide decoders in...
-
Thanks Mick, they're not exactly running at scale speed but that's what you get when you hand over control to a two year old I guess! Where the points join at the bottom of the picture (which have had the rails bonded), it has electrically connected the inner and outer loop for now so both trains were running off the same power supply, meaning I couldn't independently control their speed
-
I'll be following this thread with interest Dave. I've just built a command station using an Arduino Mega (see separate thread in Control section) and I'm now looking into using Arduino mini's to build accessory decoders. I was at first thinking of using central locking motors for point control, but I'm seriously thinking about the servos now as they use so much less power and are cheap enough if they die in the elements. Shaun
-
Thanks very much! Welcome
-
It's been a lovelly day today so I've managed to get outside for the first time of the year - winter and Doris have not been good to the garden! Still, after a bit of tidying and creosoting of the shed it would have been rude not to get the trains out. As you'll see on the seperate DCC++ thread I've managed to get it built and working, so I'm really rather chuffed. I didnt't test it out on the layout though as I only have JMRI (the DCC software) installed on my desktop and not on my laptop, I'll be getting that sorted ready for the next good weather day. Good afternoon out, enjoyed it
-
-
Well that was much easier than expected! 30 minutes was all the time it took to build the Arduino, install the code and convert my trusty Class 37 over to DCC and have it running! Total cost for the system (brackets indicate I already had, but price for info): Arduino Mega (£30) - Could be made with Arduino Uno (£20) Motor shield £20 Power supply (£5) USB cable (£1) So from scratch the project could have cost £46, but for the £20 I paid I'm rather chuffed, and after looking around on Amazon at Arduino compatible boards this could easily be made for £8.70!! The only reason why I go for genuine Arduino products and pay more is to support the foundation. Would seriously recommend anyone giving this a go...
-
Hi All I've been doing some research of late about DCC'ing my layout, and while doing so I've gone in with a wishlist: Be programmable (for automation) Have wireless control Have a smartphone app (for the boy's android tablet) Option for computer control (to set routes) Possibility for sensors (block detection) Be cheap I'll be honest and say I wasn't expecting to find anything that fitted all of those, but then I came across DCC++ - a DIY system using an Arduino and a couple of extra components. I was wondering if anyone on here has had any experience with this, and if so, what should I be be looking out for by way of issues? For those that are interested, his (the chap that came up with it) youtube channel is here: https://www.youtube.com/channel/UCJmvQx-fe0OMAIH-_g-_rZw/videos I'm lucky in the fact that I already have all of the components required with the exception of the motor shield, so if I can get this working the total cost to me should be £20 for a fully functioning and expandable DCC system. Having a look around amazon I could buy an alternative motor shield for £6.60, but the OCD in me is saying I should go for the same one as in the video to give me the best chance of succeeding. The main contender was Hornby's Railmaster and eLink, but it's not cheap, no possibility for sensors, the smartphone app costs extra, and if I want to install it on another PC I have to buy another license. So any thoughts, comments or guidance greatly appreciated. Shaun
-
Well it's been a while since I was last on here and I'll be honest and say nothing much has changed unfortunately other than where the two pairs of points lead off from the loop in the above picture, they were connected a week after the photo was taken. My wife became pregnant with our second so ultimately funds were diverted from the railway to higher priority items. However, now my daughter Frankie is safely with us and I'm taking 9 weeks off in the summer for paternity leave, construction can resume Plan of action hasn't changed from June, however at the moment I'm looking into DCC options and after doing some research I'm going down the DIY route and and building my own basestation using DCC++. I'll start off a separate thread on the subject but basically it's a system built from an Arduino Mega with a motor shield, controlled using JMRI, and gives the options of integrating sensors and automation scripting. I already have an Arduino but the shield and a decoder are on order so I'll get to have a play soon. Anyway, thought I'd swing by to say "hi" again. Excited to be cracking on again! Shaun
-
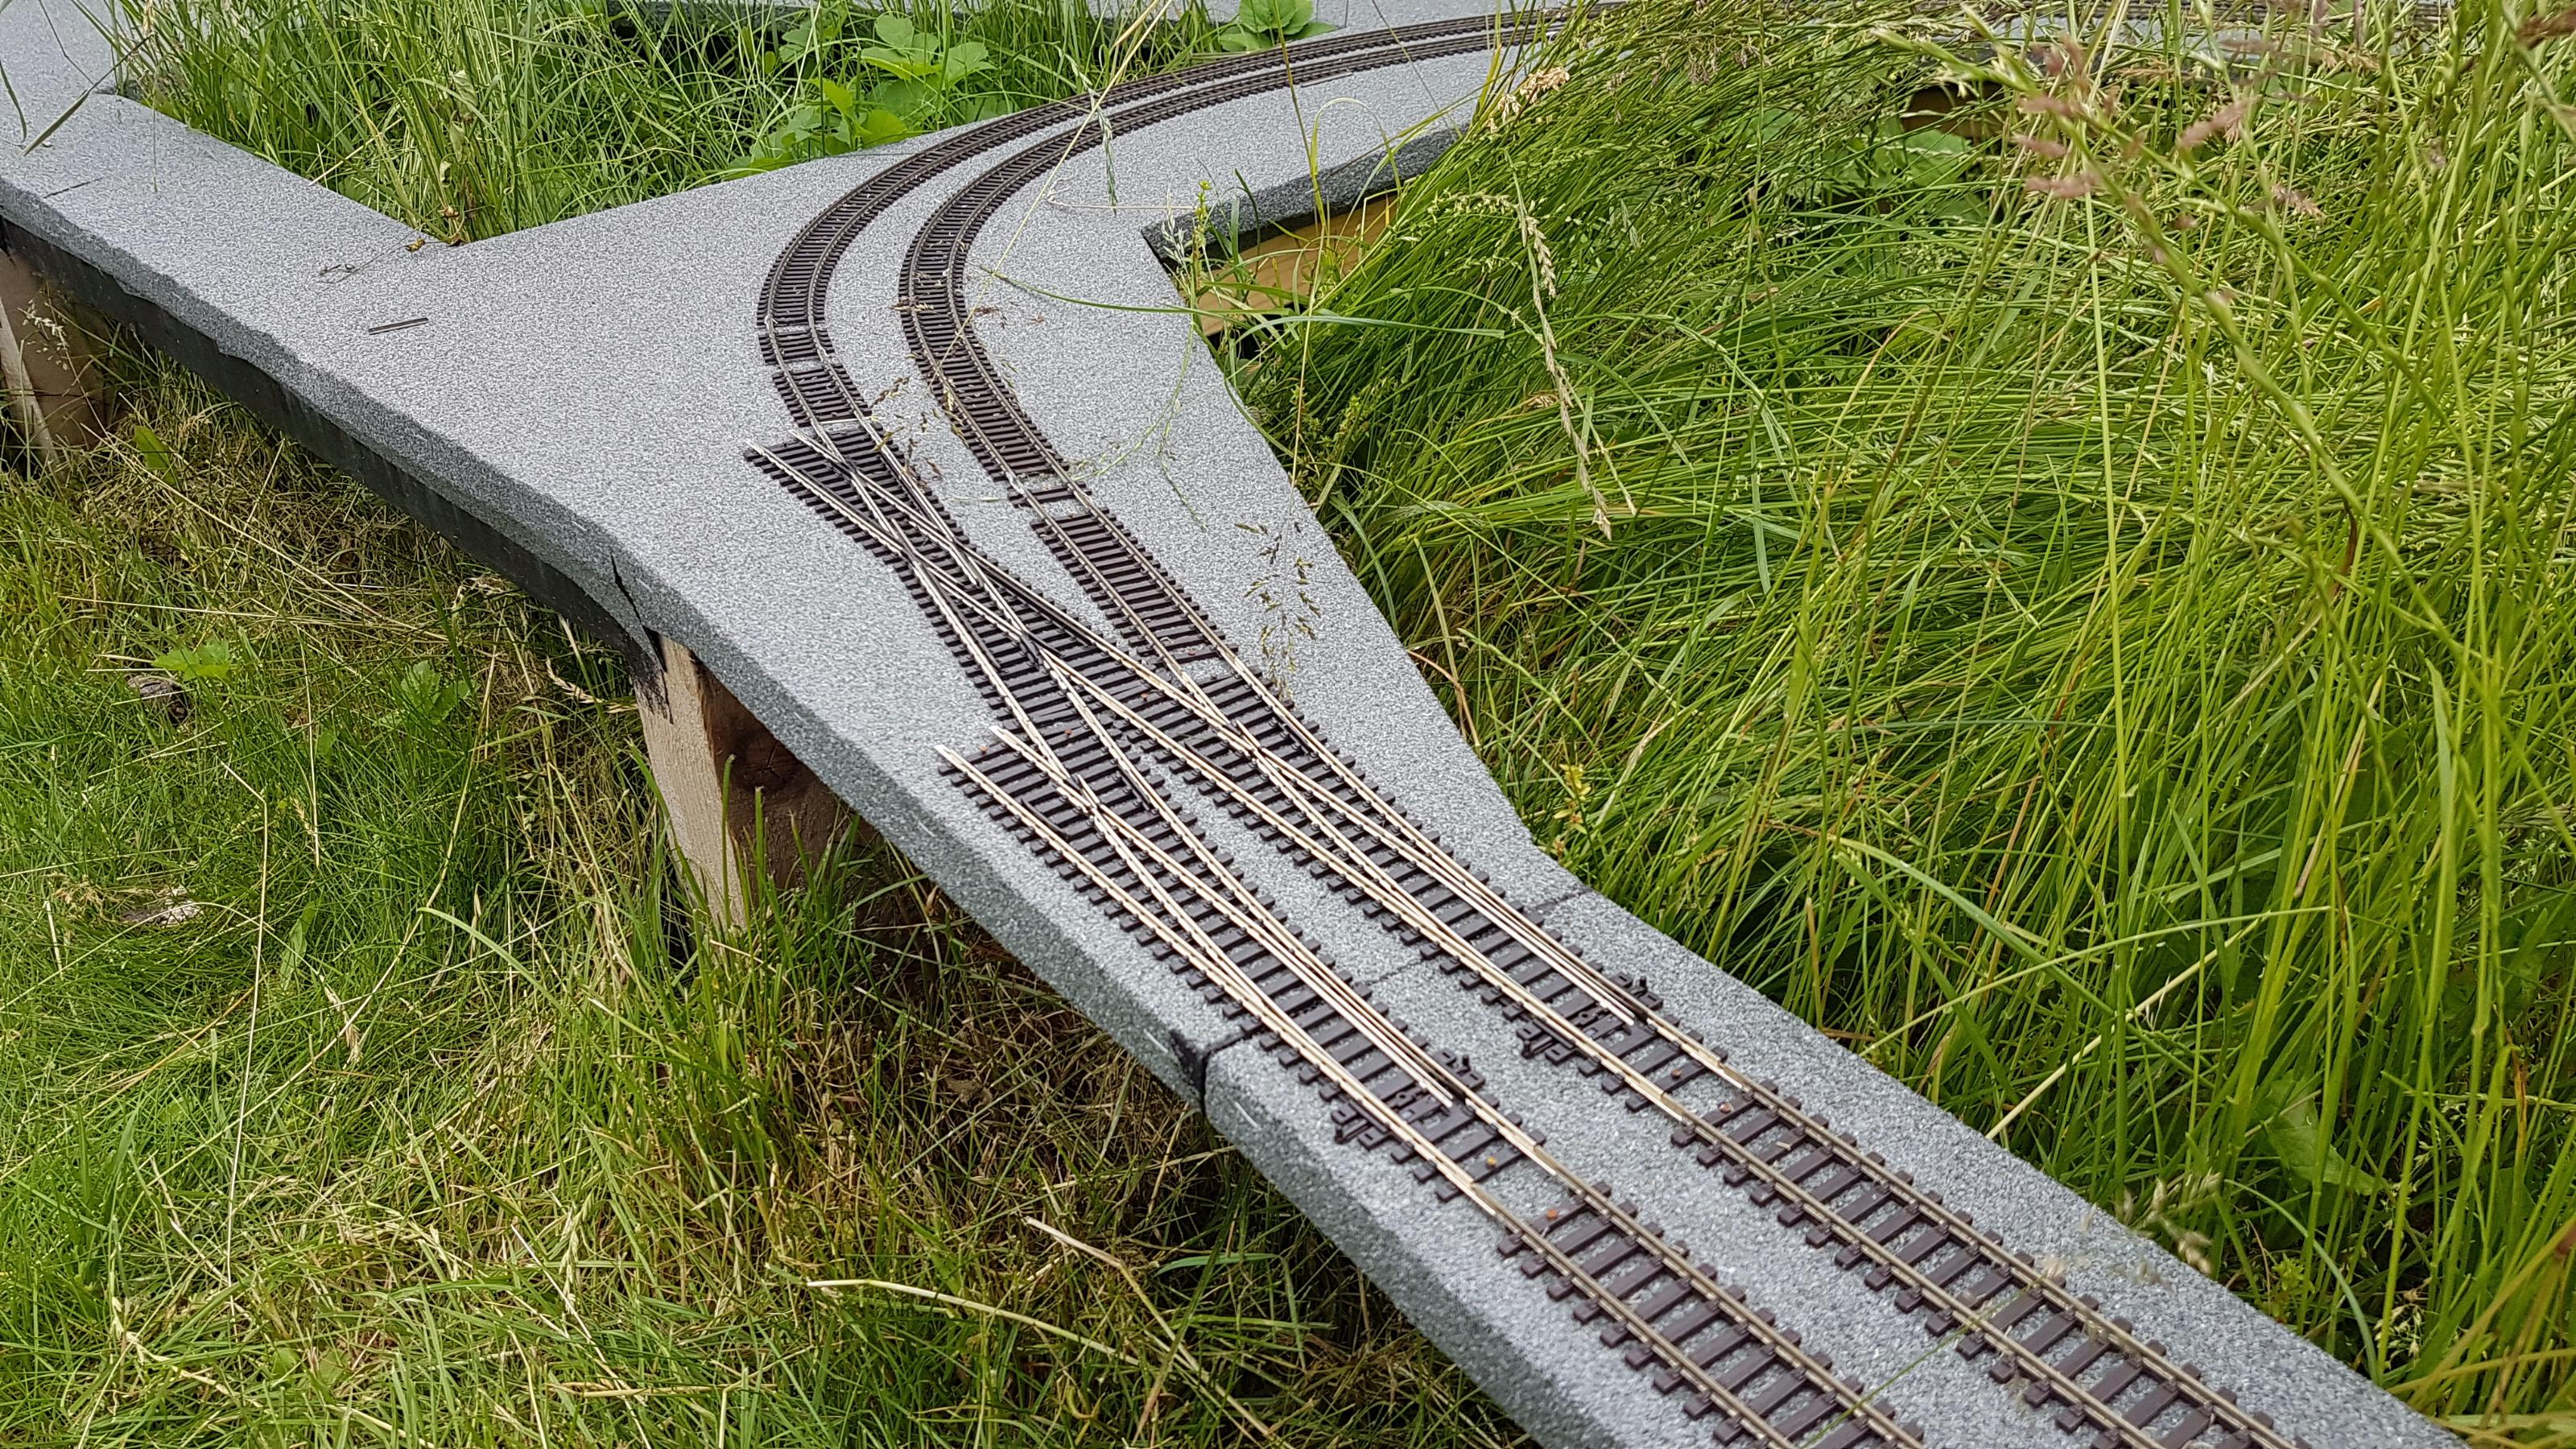
I know I said there wasn't much point laying down too much track until the rest of the boards are down, but the problem is that it's been raining here every weekend that I can work on the layout, and the one day that we have sunshine (today) I'm stuck indoors messing around with flat-pack furniture! So sod it (gruble grumble) I've been out for an hour laying points on the other side tonight. I've had to reduce the radius of the chord down to 3rd radius to get them in though, I'd originally planned for the geometry of set-track points as I didn't have streamline at the time. It's a shame, but I've tested with the locos/rolling stock I have and all works well so I'm happy. Was hoping to get the 'wye' junction down as well but I've gone and misplaced my bag of track pins. Ah well...
-
Construction has finally restarted on the Poacher Line, I'm resigned to the fact that given how expensive things are and only allowing myself £50 a month to play with, there are going to be periods of inactivity. Ah well. Only the two points and crossing laid today as there's not much point putting down too much track until the rest of the boards are in place, but I needed that to give me tue enthusiasm to get back on with it
-
We were a little more professional in the fact that ours was typed rather than handwritten, but I agree it's a joke. Funnily enough I said to my wife when we left how easy it would be to walk in and say my name was "joe bloggs, 123 Normal Street" and take someone else's vote
-
Well I've given myself a couple of months off from the layout and I think it's about time to crack on again. Well, when Summer decides to pay a visit anyway! I've still been lurking on here and I'm amazed at how much progress some people have made in such a short period of time! I've just placed my order with Hattons for another box of flextrack, 6 points, 3 crossovers and a few packets of joiners - £170! It still sickens me how much track costs for what it is, but moaning aside that'll now give me enough track to get down to the shed and back with hopefully enough left over to convert the station area to either 3 or 4 lines. Even 2 months later I'm still undecided! I've been "umming" and "arring" at type of baseboard to use in the shed and trying to work out if I can acquire some for free from somewhere, and when my wife suggested getting a new set of wardrobes for our bedroom to replace my ancient thing the problem was solved! I don't think I'll bother adding cork to the board unless the noise of the locos running on it can be heard from the garden; I won't be spending time in the shed while they're running and it's only going to be used as a fiddle yard to hold the trains rather than a scenic area. So the plan of action: 1. Get the remaining couple of posts into the ground towards the shed 2. Cut the baseboards to shape and bitumen coat 3. Fix the boards in place and felt 4. Lay boards in shed and cut access hole 5. Re-roof and declutter shed 6. Lay track Sounds easy when you list it out like that Looking forward to getting back into the construction side of things again though! Shaun