Leaderboard


Popular Content
Showing content with the highest reputation on 09/19/2020 in all areas
-
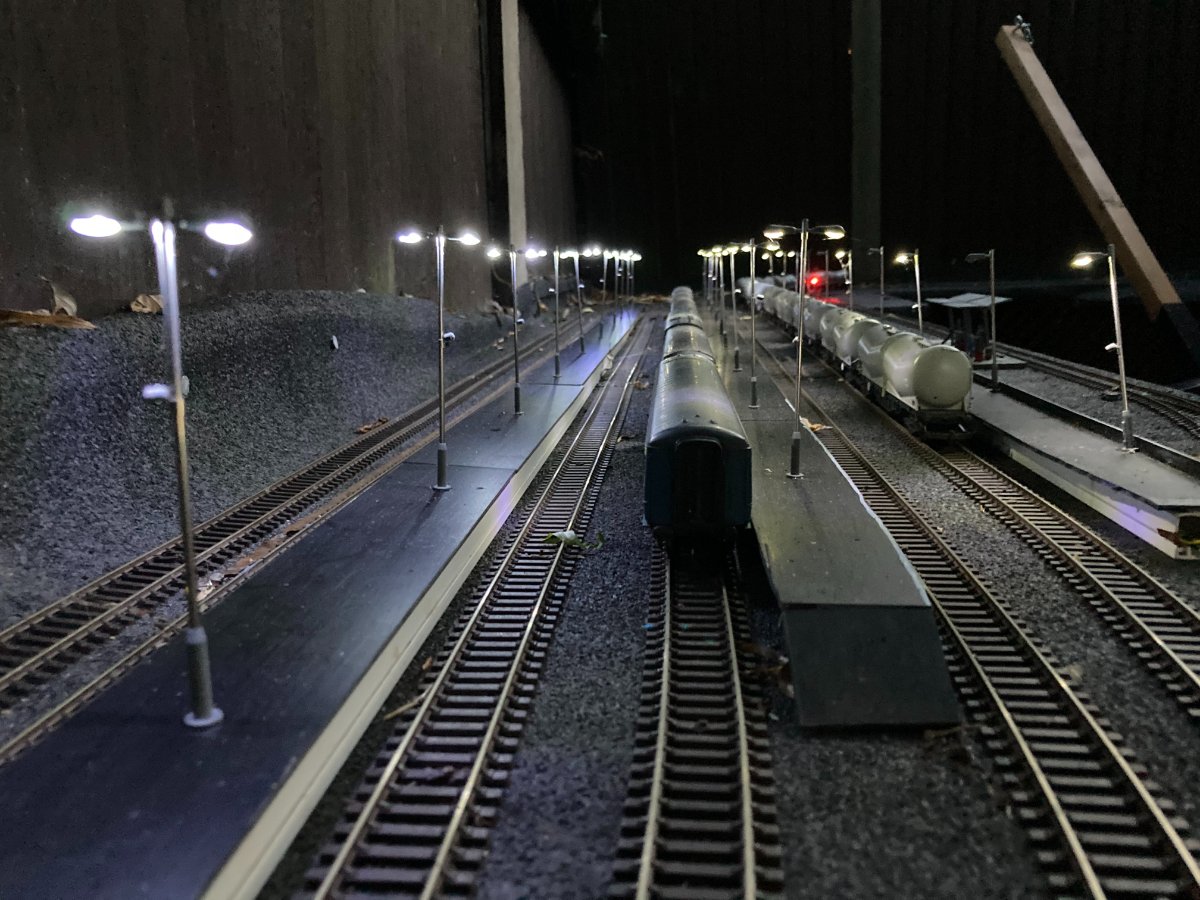
So, where was I, oh yes, last time I'd really put any update on here was shortly after rebuilding the main station, Pentney Parkway, well, since then a lot has happened. I decided that I didn't want to progress the station any further, eg platforms and lighting, until I had a suitable way of protecting it from the elements (This includes 4 legged incursions!!), or more specifically the rain and leaves from the Willow Tree that the station is under. It was the dear lady wife who, after some deliberation came up with a tarpaulin, fixed to the fence, by hooks but wrapped around a 2"x2" batten at the bottom. The idea is that the batten weights it down on the ground in front of the layout when out of use, but when trains a running, the tarpaulin can be rolled up and placed on two large brackets above the station. It's crude but very effective! The next stage was to sort out the ground infront of the station as it was just hard soil, this has been cleared and gravel laid instead meaning that if it has been raining I won't slip a over b! My stool and a much bucket now live under the station so loose leaves are easily collected and I have somewhere to sit for shunting! So now I'm in a position to continue with the station. Platform lights have been added, I went for the newly released Model Signs ones as they fit the era I'm portraying (BR Blue to sectorisation). These have all been wired into the track feed, although I m thinking of separating them off onto their own supply. benches and people have now also been added so it does look more like a station now. Behind the platforms a fuel point (Again with lights fitted) has been installed complete with portacabin, whilst the loco servicing point has gained lighting as have the portacabins next to it. Meanwhile down at Pentney Town station, the surrounding buildings have been put in place on the removable board and fitted with lights. A trip to a secondhand model shop saw £70 spent on some suitable 2nd hand buildings, not a bad haul to be fair! The last "major" job was on the Jez Laming Memorial Bridge. This now has lights fitted under the top, whilst not authentic it does look very effective at night. So, plenty of work has taken place, but I have had some time to run trains. I managed last month to get a small handful of friends round for a running session, which started of well but ended up being aborted owing to "power supply issues" (I thought I was at work then!!!). After several days of testing and seeking help on the DCC forum's I narrowed the issue down to my transformer only putting out 10v AC instead of 16! A new transformed has now been obtained and all is running well again. Several video's have been taken as well, these can all be viewed on my you tube (They are all un editied as I'm not as clever as some of you on here and have yet to learn how to edit and put words etc on them!). My favorites thought are these:- 47145 passes the Rockery Noel
 2 points
 -
As most of you will have gathered I'm not much of a rail enthusiast so I tend to model what I like rather than what I probably should. I don't worry too much about running stock together that probably never came close to meeting each other during their life times but I do take notice if anything is ever pointed out to me. I might decide not to do anything about it but there again I might on occasion heed the advice. One of the comments on my YouTube feed pointed out that, as nice as it looks, 47715 Haymarket wasn't fitted with the buffer beam ETH sockets as I had portrayed it and the correct location for them meant that snowploughs couldn't be fitted. So I had a quick look around and to my disappointment I discovered no pictures with snowploughs fitted and the ETH sockets placed differently to where I had affixed mine. Well there wasn't a great deal I could do about the ETH sockets so I did my best to make it look more realistic by relocating one of them. I'm not sure it's the correct one or that it's in exactly the right location but it's now clear of the buffer beam. And then, reluctantly I have to admit, I removed the snowploughs. I need a driver figure in that cab and a replacement screw coupling for that hideous example provided in the detail pack which I've actually used! And the top of that cab still needs weathering - I've seen videos of push-pull sets in Glasgow station where the loco's are so dirty that there's no visible yellow above the cab front windows but I like to see it showing through so mine won't be as bad as that. As for the coaches that make up the push-pull set, I've removed one coupling entirely from the coach next to the loco as it is not at the correct height for a Kadee coupling and in its place I've fixed on one of my own contraptions using a piece of plastic glued over the original coupling hole and then an NEM mounting block suitably filed down and glued onto that. At least now the Kadee matches up with the loco. The remaining coaches I've fitted with Hornby R8220 close-couplers which bring the coaches slightly closer together and I may now fix corridor connections in place to close the gap. The couplers do appear to lock firmly together and there's doesn't appear to be any drooping couplings when propelling the set but I'll have to wait until I can give the whole set a decent run round once the glue has dried on that first coach. I've also changed the address of my DBSO and consisted it with the loco so that the directional lights work together. All this faffing about has left no time whatsoever for any running today.
1 point
-
I just used this stuff and have noticed the expansion and contraction is a bit more than track pin breaking. In the day time it expands a lot opening gaps in the track. Then at night when cooler shinks so the track expansion gaps disappear buckling the track until it warms up again. Am going to try some methods to fix the issue, this being ensure the plastic base has gaps every 300mm on the straights, and ensuring my track peices are cut into half yards to spread the movement across more joints. I will see how i get on1 point