Stese
-
Posts
58 -
Joined
-
Last visited
-
Days Won
4
Stese's Achievements
Advanced Member (3/7)
6
Reputation
-
Stenbrädet Järnväg / Quarry Hill Railway
Stese replied to Stese's topic in Layouts In the Planning Stage
i've started building again, and move to posting in the garden railways topic... -
Just an update on this... FINALLY got my preorder sorted with hattons. (their system lost the pre-order, so it didn't notify me when it came in!) Should be with me on Tuesday this week... might take an evening after work to have a play.
-
I was a little concerned also when I saw that. He has, however kept it simple to start with, which is good advice imho.
-
Stenbrädet Järnväg / Quarry Hill Railway
Stese replied to Stese's topic in Layouts In the Planning Stage
Thanks mick. I know i'm going to have challenges on this project but it wouldn't be as fun if it was too easy! -
Stenbrädet Järnväg / Quarry Hill Railway
Stese replied to Stese's topic in Layouts In the Planning Stage
Well, I'm back here in the planning section, as I had to remove some of the construction... I'm making some changes in the plan on how I'm going to rebuild the railway, once I get there...Before I can do anything, I've decided that I'm going to need a new, slightly bigger shed. I'm hoping for an 8ftx6ft, with the door on the end, as normal. Around 3 sides will be a worksurface/baseboard at around 1m high (lower than the current railway), with shelves at sensible heights above and below. The railway will be run on the back and right hand walls as you walk in, in a similar configuration to the current shed. The left hand worksurface will become a general use work bench.As for the railway itself, I'm going to build it in smaller sections, aiming each section to have a good amount of scenery and detail, and will be protected from the outside elements by a hard cover. This won't prevent all the damage by the conditions but should stop most. The scenic areas will be connected together by very bland railway lines, which will have little in the way of features that can be damaged by the weather, with the connection between the two being a tunnel portal or similar.The scenic areas will no longer be flat boards, There will be a lower frame of thick ply, which will carry a very thin layer of ply on supports to carry the track. This will make it simpler to vary the height of certain areas of the layout. I've attached a picture of the first scenic area in planning...
-
Stenbrottkulle Järnväg / Quarry Hill Railway
Stese replied to Stese's topic in Members Garden Railways
for now, I'll move back to the planning forum. -
I've got the same B&D drill (18v version) and it's done me proud... other than the PSU for the charger failing! I'll rebuild that some day, lol. I replaced it with a Ryobi One+ and I couldn't be more impressed with the performance..
-
That will be the problem then! I'd advise the same... but i think he means a rectifier rather than just a diode!
-
What's the standard transformer? Other than the power, is there any interconnection between the MAS Sequencer signals, and the Switched signals?
-
Hi Mick, I've had a look at that video, and and first, i'm going to assume that you can't see the effect with the naked eye. I think you've actually already spotted the issue, in finding that the results are different with camera settings... So, it's got me wondering, how are you supplying power for those LED's? Would I be correct t assume you've pulled the feed from your DCC supply, and have some kind of switching system in place, or you've got a PWM (pulse width modulation) dimmer involved? I believe that the issue you are seeing here, is that the frequency of the supply (either DCC or PWM dimmer) and the frequency of the camera are coming in and out of phase, causing the effect you are seeing. With the assumptions above, I think you've got two options :- Fit a DC Supply, and use relays to separate the DCC from the DC. Put a bridge rectifier and capacitor between the anode and cathode of each led, smoothing the feed. You'd probably also want a load resistor between the LED legs as well, to stop the LED's fading out when the supply is removed. anyway.... those are my ramblings on the problem... may be way off with the assumptions! Regards, Steve.
-
Hi Mick, I've had a look at the previous video and I can't see any flickering or fading, so it might be the screen that you are viewing these on....
-
Stenbrottkulle Järnväg / Quarry Hill Railway
Stese replied to Stese's topic in Members Garden Railways
well.... it occurred to me i've not updated the post. After a promising start, i had no further development over the summer due to peco not being able to fulfill orders... this has since been resolved and some points, motors etc are waiting in my hattons trunk.... however, i've had a problem with my fence and taken the two boards down so that I can deal with it...so it will be some time before I can carry on. I have however decided that i'm going to replace the shed with a larger one, So that my tools etc are not separate. I'll also lower the railway so its more stable, as I won't be attaching it to the fence. -
Hi Jimbob, Are you able to provide a link to the part you are using? Regards, Steve D.
-
Stenbrottkulle Järnväg / Quarry Hill Railway
Stese replied to Stese's topic in Members Garden Railways
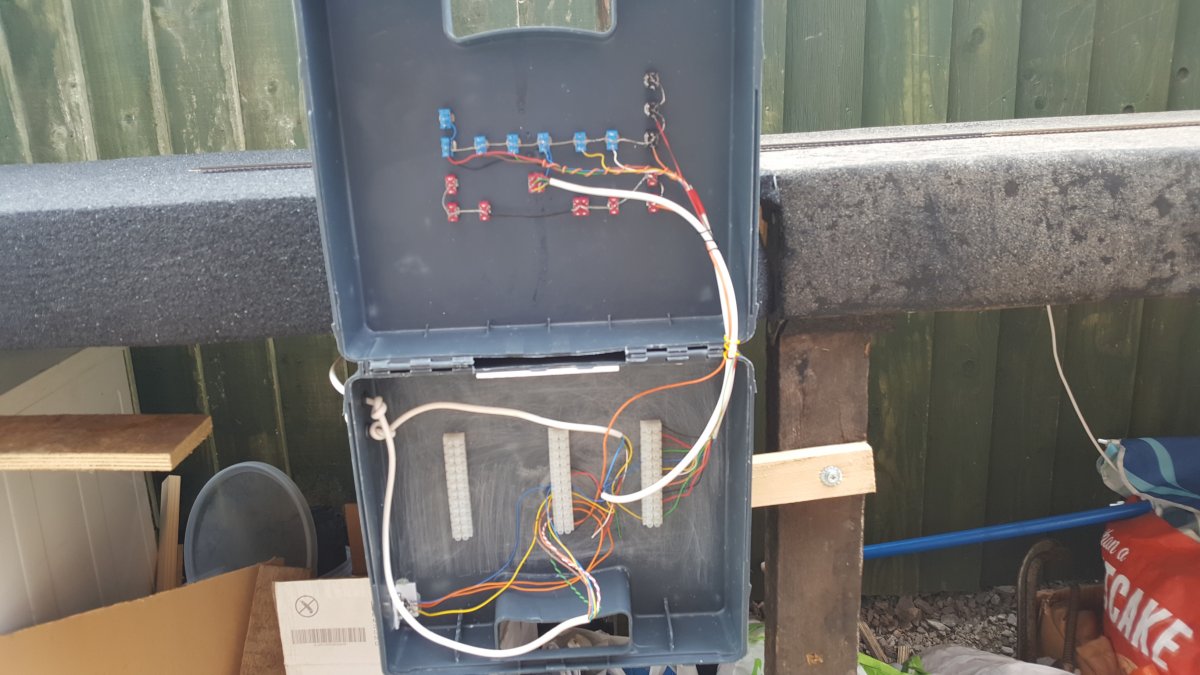
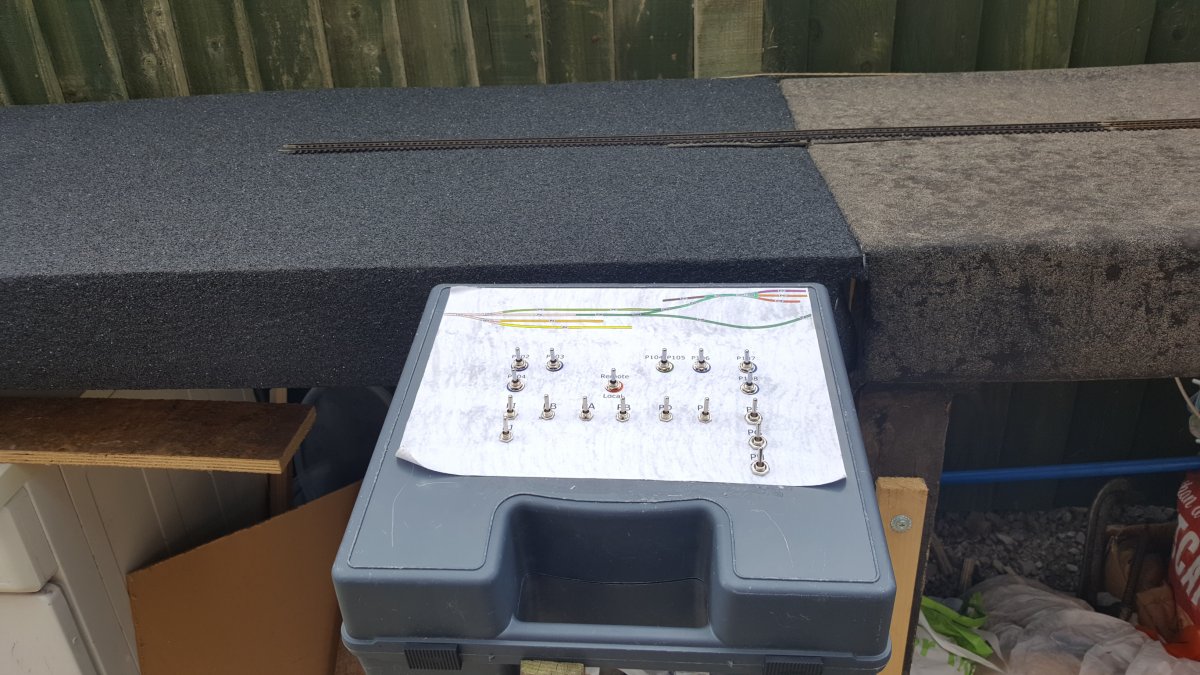
managed to get the next control panel in place...
-
They really look good!